
vital signs record sheet pdf
Category : PDF
What is a Vital Signs Record Sheet?
Vital signs record sheets, often available as a PDF, are crucial tools for clinicians to systematically document patient physiological measurements.
These templates, like those on pdfFiller, facilitate tracking temperature, pulse, respiration, and blood pressure, aiding comprehensive patient assessment.
Additional Information:
- Printable daily vital sign charts are readily available online.
- Templates help assess patient vital signs effectively.
Definition and Purpose
A vital signs record sheet, frequently accessed as a PDF form, is a standardized document used by healthcare professionals to record a patient’s core physiological measurements.
Its primary purpose is to provide a concise, organized, and readily accessible overview of a patient’s health status over time.
These sheets, such as the Vital Signs Flow Sheet from Patient-Advocate.com, enable consistent data collection, including temperature, pulse rate, respiration rate, blood pressure, pain levels, and oxygen saturation.
Utilizing a template ensures all essential data points are captured, supporting informed clinical decision-making and effective patient monitoring.
Key Features:
- Facilitates accurate and consistent data recording.
- Supports trend analysis and early detection of changes.
Importance in Patient Monitoring
Vital signs record sheets, often utilized as downloadable PDFs, are fundamentally important in continuous patient monitoring.
Regular recording, using a standardized template, allows healthcare providers to quickly identify subtle changes in a patient’s condition, potentially indicating deterioration or improvement.
These sheets, like those found on pdfFiller, enable early detection of critical events, facilitating timely intervention and improved patient outcomes.
Consistent documentation supports effective communication among the care team, ensuring a coordinated approach to patient management and enhancing overall safety.
Benefits:
- Early detection of patient deterioration.
- Improved communication among healthcare staff.

Components of a Standard Vital Signs Record Sheet
A typical vital signs record sheet PDF includes sections for patient demographics, date/time, temperature, pulse, respiration, blood pressure, pain levels, and SpO2.
Key Elements:
- Patient identification details.
- Specific fields for each vital sign.
Patient Demographics Section
The Patient Demographics Section of a vital signs record sheet PDF is fundamental for accurate patient identification and record linkage. This section typically requires essential details such as the patient’s full name, date of birth (DOB), medical record number, and gender.
Accurate demographic data ensures that vital signs are correctly associated with the intended patient, minimizing potential errors in care. Some templates, like those found on Patient-Advocate.com, explicitly include fields for these details, streamlining the documentation process and promoting patient safety.
Important Considerations:
- Verify information against official records.
Date and Time Recording
Precise Date and Time Recording is a critical component of any vital signs record sheet PDF. Each set of vital sign measurements must be meticulously timestamped to establish a chronological record of the patient’s physiological status.
This allows healthcare professionals to track trends, assess the effectiveness of interventions, and identify any acute changes. Templates often include dedicated fields for date and time, formatted for clarity (e.g., ). Consistent and accurate time documentation is essential for informed clinical decision-making.
Key Points:
- Use a standardized time format.
Temperature Measurement
Temperature Measurement sections on a vital signs record sheet PDF typically include fields to record the temperature value and the measurement site (oral, rectal, axillary, tympanic). Accurate documentation of the method used is crucial for proper interpretation.
Standardized templates facilitate consistent data collection. Healthcare professionals should note any factors that might influence the reading. The sheet should allow for recording temperature in both Fahrenheit and Celsius, ensuring clarity and avoiding errors in patient care.
- Specify the measurement method.
Pulse Rate Assessment
The Pulse Rate Assessment section within a vital signs record sheet PDF requires documenting beats per minute (BPM). Fields should include space for rate, rhythm (regular or irregular), and pulse strength (bounding, strong, weak, thready).
Standardized templates ensure consistent data capture. Noting the location where the pulse was measured (radial, apical, etc.) is essential. Accurate pulse rate documentation aids in evaluating cardiovascular function and identifying potential abnormalities, contributing to effective patient monitoring.
- Record BPM, rhythm, and strength.
Respiratory Rate Observation
The Respiratory Rate Observation section on a vital signs record sheet PDF necessitates recording breaths per minute. Documenting the depth (shallow, normal, deep) and character (labored, easy) of respiration is also crucial.
Templates often include space to note any abnormal breathing patterns, such as wheezing or apnea. Accurate respiratory rate assessment is vital for evaluating a patient’s oxygenation and ventilation status, aiding in the early detection of respiratory distress or compromise.
- Note breaths per minute, depth, and character.
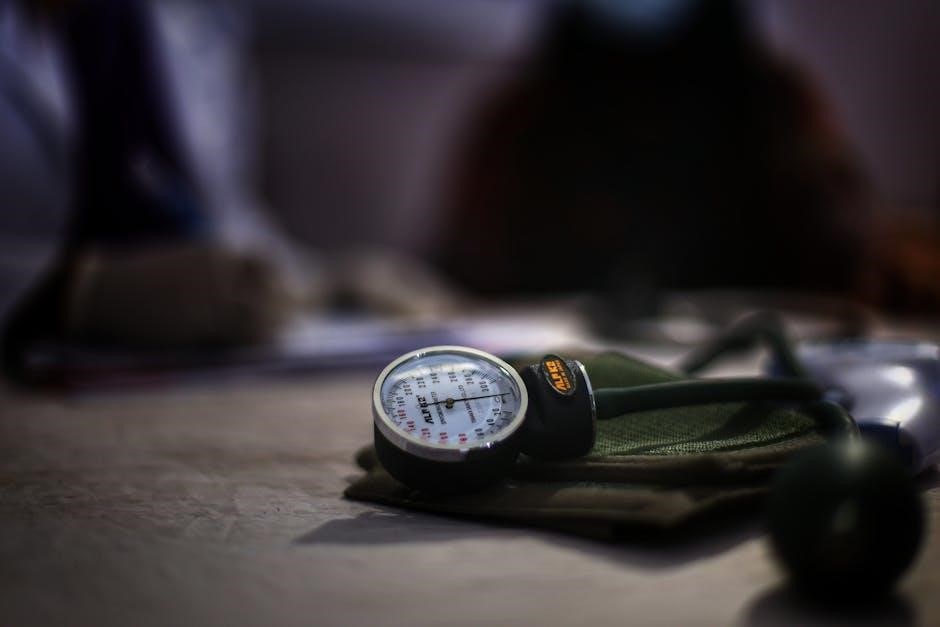
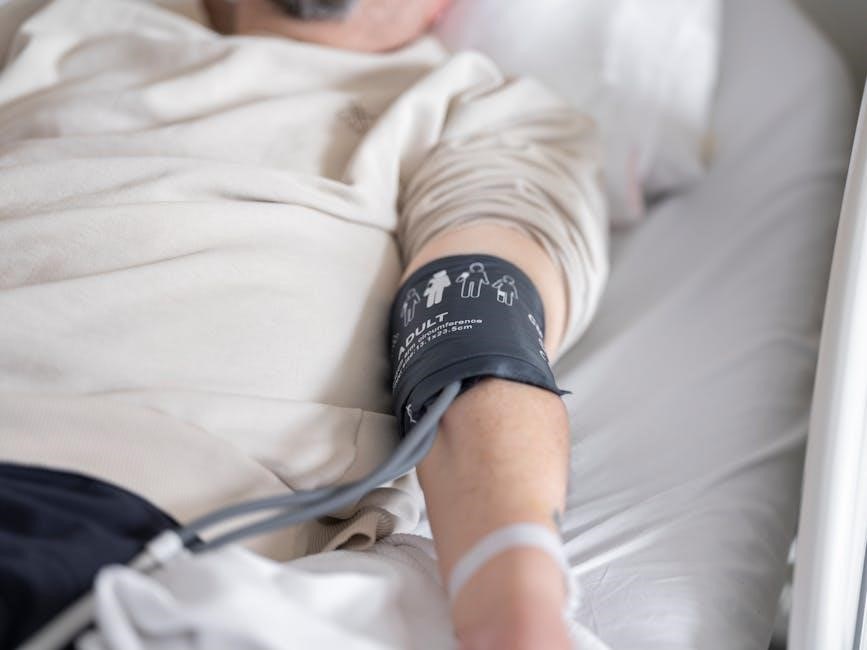
Blood Pressure Recording
The Blood Pressure Recording section within a vital signs record sheet PDF requires documenting both systolic and diastolic pressures, typically expressed in millimeters of mercury (mmHg).
Templates often include columns for recording the arm used (left or right) and the patient’s position during measurement. Accurate blood pressure assessment is fundamental for evaluating cardiovascular function and identifying potential hypertension or hypotension. Consistent documentation supports effective patient monitoring and timely intervention.
- Record systolic and diastolic pressures accurately.
Pain Level Assessment
A vital signs record sheet PDF commonly incorporates a Pain Level Assessment section, utilizing numerical rating scales (0-10) or visual analog scales to quantify a patient’s subjective experience.
Templates often prompt documentation of pain location, character (sharp, dull, aching), and alleviating/aggravating factors. Consistent pain assessment is crucial for effective pain management and improving patient comfort. Accurate recording supports informed clinical decision-making and appropriate analgesic interventions.
- Utilize standardized pain scales for objective measurement.
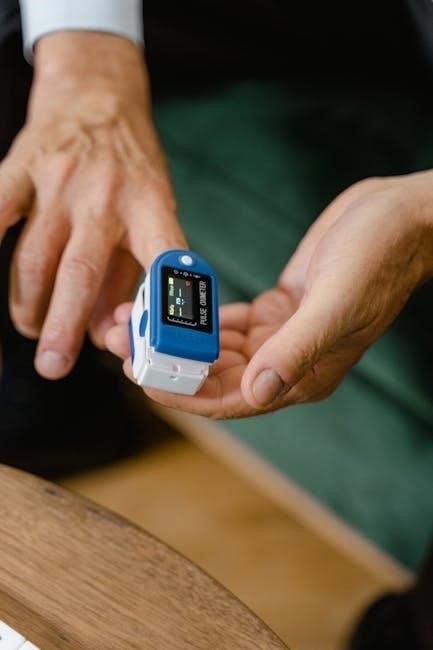
Oxygen Saturation (SpO2) Monitoring
Vital signs record sheet PDFs invariably include a dedicated field for Oxygen Saturation (SpO2) monitoring, a critical indicator of respiratory function.
This section records the percentage of hemoglobin saturated with oxygen, typically measured using a pulse oximeter. Templates facilitate tracking SpO2 levels alongside other vital signs, enabling early detection of hypoxemia. Consistent monitoring is essential for patients with respiratory conditions or those at risk of oxygen desaturation, guiding timely interventions.
- Document SpO2 with the method used (e.g., pulse oximetry).

Vital Signs Record Sheet Templates: Formats and Availability
Vital signs record sheet PDFs are widely accessible in printable, fillable PDF, and Excel formats.
Resources like pdfFiller, Printables Hub, and Patient-Advocate.com offer diverse templates for convenient download and use.
- Ready-to-use PDF forms streamline patient monitoring.
Printable PDF Templates
Printable vital signs record sheet PDFs offer a straightforward, no-tech solution for documenting patient data.
These templates, easily found on sites like Printables Hub, are ideal for facilities or individuals preferring a paper-based system.
They typically include pre-designed tables for recording temperature, pulse, respiration, blood pressure, pain levels, and oxygen saturation.
- Convenient for quick data capture during rounds.
- Eliminates the need for electronic devices.
- Suitable for situations with limited technology access.
Downloadable PDFs ensure consistent formatting and ease of reproduction.
Digital/Fillable PDF Templates
Digital, fillable vital signs record sheet PDFs combine the convenience of a digital format with the familiarity of a traditional chart.
Platforms like pdfFiller host these templates, allowing direct data entry into the form fields—Patient name, DOB, Physician, and vital sign measurements.
This eliminates handwriting and potential for misinterpretation, streamlining documentation.
Benefits Include:
- Easy data entry and storage.
- Reduced paperwork and improved organization.
- Potential for integration with other digital systems.
These PDFs can be saved, emailed, and printed as needed.
Excel-Based Templates
While PDFs are common, vital signs record sheets can also be found as Excel-based templates, offering a different set of advantages.
Excel allows for customized calculations, automated charting, and more complex data analysis beyond simple recording.
Users can create formulas to flag abnormal values or generate trend graphs directly within the spreadsheet.
- Customizable data fields and calculations.
- Ability to create visual representations of data.
- Easy data sorting and filtering.
However, Excel requires more technical skill than a pre-formatted PDF.
Using a Vital Signs Record Sheet: A Step-by-Step Guide
Begin by accessing a vital signs record sheet PDF; fill essential fields like patient details and date.
Accurately measure and document each vital sign in the designated table, ensuring clarity.
Important Note:
Review and interpret the recorded data for any concerning trends.
Preparing the Sheet
Before initiating vital sign measurements, ensure you have a readily available vital signs record sheet PDF, either printed or digitally accessible.
Verify all necessary equipment – thermometer, sphygmomanometer, pulse oximeter – is functioning correctly and within calibration dates.
Confirm patient identification and gather any relevant medical history that might influence vital sign interpretation.
Clearly label the sheet with the patient’s name, date, and time of assessment, utilizing a standardized format for consistency.
Having a prepared sheet streamlines the process and minimizes errors during data collection.
Key Considerations:
- Ensure the PDF is the current version.
- Double-check all equipment.
Accurate Measurement Techniques
Employing standardized techniques is paramount when utilizing a vital signs record sheet PDF for data capture. For temperature, select the appropriate method – oral, tympanic, axillary – and follow established protocols.
When measuring pulse, palpate the radial artery for a full 60 seconds, or 30 seconds multiplied by two, ensuring accurate count.
Respiratory rate assessment requires discreet observation, counting breaths per minute without alerting the patient.
Blood pressure measurement demands proper cuff size and technique, following auscultatory methods.
Important Reminders:
- Consistent technique ensures reliable data.
- Document any deviations from normal procedures.
Data Entry and Documentation
When completing a vital signs record sheet PDF, legibility and completeness are essential. Enter all measurements accurately into the designated fields, utilizing consistent units – Celsius or Fahrenheit for temperature, beats per minute for pulse, and so on.
Clearly document the time each vital sign was obtained, alongside any relevant observations or contextual factors.
If using a fillable PDF, ensure all fields are properly populated before saving.
- Avoid abbreviations; use full terms for clarity.
- Initial and date each entry to maintain accountability.
Reviewing and Interpreting Vital Signs
Regularly reviewing completed vital signs record sheet PDFs is critical for identifying trends and potential patient deterioration. Compare current readings to baseline values and established normal ranges.
Look for significant deviations or patterns indicating a change in a patient’s condition.
Utilize resources like Normal Vital Signs Charts to aid interpretation.
Important Steps:
- Consider the patient’s overall clinical picture.
- Document any concerning findings and escalate as needed.

Benefits of Using a Standardized Vital Signs Record Sheet
Standardized vital signs record sheet PDFs improve data accuracy, enhance communication, and streamline care, facilitating trend analysis for better clinical outcomes.
Key Advantages:
- Improved organization and efficiency.
- Automated data collection.
Improved Data Accuracy
Utilizing a standardized vital signs record sheet PDF significantly minimizes errors in data collection. Pre-defined fields and structured formats, available through resources like pdfFiller, reduce ambiguity and ensure all necessary measurements are consistently recorded.
This structured approach, compared to freehand notes, lessens the chance of misinterpretation or omission of critical information.
Benefits of Accuracy:
- Reliable patient monitoring.
- Better informed clinical decisions.
Consistent data entry contributes to a more accurate patient health profile.
Enhanced Communication Among Healthcare Professionals
A standardized vital signs record sheet PDF fosters seamless communication between doctors, nurses, and other healthcare team members. Clear, concise documentation, easily shared electronically or printed, ensures everyone accesses the same accurate patient information.
Using a consistent template, like those found on Patient-Advocate.com, eliminates confusion stemming from varied charting styles.
Improved Collaboration:
- Faster handoffs during shift changes.
- Reduced risk of miscommunication.
This streamlined process improves overall patient care coordination.
Streamlined Patient Care
Employing a vital signs record sheet PDF significantly streamlines patient care workflows. Pre-designed templates, accessible via platforms like pdfFiller, allow for quick and efficient data capture during assessments.
This reduces the time spent on documentation, freeing up healthcare professionals to focus more directly on patient needs.
Efficiency Gains:
- Faster identification of critical changes.
- Improved response times to patient deterioration.
A well-organized chart supports proactive and effective care delivery.
Facilitates Trend Analysis
A standardized vital signs record sheet PDF is invaluable for tracking patient health trends over time. Consistent documentation within a structured template—easily found online—allows clinicians to identify subtle changes that might otherwise be missed.
This longitudinal data supports informed decision-making regarding treatment adjustments and preventative measures.
Analytical Benefits:
- Early detection of worsening conditions.
- Evaluation of treatment effectiveness.
The chart enables proactive, data-driven patient management.

Where to Find Reliable Vital Signs Record Sheet PDFs
Reliable vital signs record sheet PDFs are accessible through resources like pdfFiller, Printables Hub, and Patient-Advocate.com, offering various templates for download.
Resource Highlights:
- pdfFiller provides fillable forms.
- Printables Hub offers printable options.
pdfFiller Resources
pdfFiller stands out as a comprehensive online resource for accessing and utilizing vital signs record sheet PDFs. The platform offers a wide selection of pre-built, fillable templates designed to streamline patient monitoring documentation.
Users can easily access essential fields like patient details (name, DOB), physician information, and dedicated sections for recording vital signs – temperature, blood pressure, pulse, respiration, and pain levels.
- Accessibility: Easily find and download PDF forms.
- Fillable Fields: Conveniently input data directly into the template.
- Customization: Modify forms to suit specific facility needs.
pdfFiller simplifies the process of creating and managing vital signs flow sheets, enhancing efficiency in healthcare settings.
Printables Hub Options
Printables Hub provides a diverse collection of free, printable vital signs log sheet templates in PDF format, catering to various nursing and healthcare documentation needs. These resources include daily vital sign charts and trackers, designed for efficient patient monitoring.
The available templates offer a structured format for recording essential measurements like temperature, pulse rate, respiration rate, blood pressure, and oxygen saturation levels.
- Variety: Numerous templates to choose from.
- Accessibility: Free and readily downloadable PDFs.
- Simplicity: Easy-to-use formats for quick data entry.
Printables Hub offers a convenient solution for healthcare professionals seeking readily available vital signs documentation tools.
Patient-Advocate.com Examples
Patient-Advocate.com offers a readily available vital signs flow sheet in PDF format, designed for comprehensive patient monitoring and documentation. This particular template includes dedicated sections for recording patient demographics, date, weight, temperature, blood pressure, pulse, pulse oximetry, and pain levels.
The sheet also provides space for nurse’s initials and notes, facilitating clear communication among healthcare providers.
- Comprehensive: Covers essential vital signs.
- User-Friendly: Simple layout for easy data entry.
- Professional: Suitable for clinical settings.
This PDF provides a practical tool for maintaining accurate and organized patient records.
Customizing Vital Signs Record Sheets
PDF vital signs record sheets can be tailored by adding facility logos, specific protocols, or fields for unique patient populations.
Integration with Electronic Health Records (EHR) streamlines workflows.
Considerations:
- Facility-specific data.
- Patient population needs.
Adding Facility-Specific Information
PDF vital signs record sheets offer a customizable base for healthcare facilities. Templates can be branded with hospital logos and contact details, ensuring clear ownership and easy identification.
Adding specific unit names, location codes, or internal protocol numbers enhances organization and traceability.
Furthermore, incorporating pre-approved nursing signatures or physician authorization lines streamlines documentation processes.
Key Customizations:
- Facility logo and contact information.
- Unit/location identifiers.
- Internal protocol references.
These additions maintain standardization while reflecting the unique operational needs of each healthcare setting.
Tailoring to Specific Patient Populations
Vital signs record sheet PDF templates can be adapted for specialized patient groups. Pediatric charts may include growth parameters alongside standard vitals, while geriatric versions could emphasize fall risk assessments.
For cardiac patients, dedicated sections for edema scoring or medication lists prove invaluable.
- Pediatric growth charts integration.
- Geriatric fall risk assessment fields.
- Cardiac-specific data tracking.
Customizing templates ensures relevant data capture, improving the quality of care and supporting targeted interventions for diverse patient needs.
Integrating with Electronic Health Records (EHR)
Seamlessly incorporating vital signs record sheet PDF data into Electronic Health Records (EHR) streamlines workflows and minimizes errors. Digital templates with fillable fields facilitate direct data transfer, eliminating manual entry.
API integrations allow automated population of EHR fields, enhancing data accuracy and accessibility.
- Reduced manual data entry.
- Improved data accuracy.
- Enhanced EHR data accessibility.
This integration fosters a more connected and efficient healthcare ecosystem, supporting informed clinical decision-making;

Normal vs. Abnormal Vital Signs Ranges
Vital signs record sheet PDFs often include reference ranges for temperature, pulse, respiration, blood pressure, and SpO2, aiding quick identification of abnormalities.
Resources:
- Normal/Abnormal charts enhance assessment.
Normal Temperature Ranges
Vital signs record sheet PDFs typically define normal body temperature as 97.8°F (36.5°C) to 99°F (37.2°C), though slight variations exist.
Temperature readings above 100.4°F (38°C) generally indicate a fever, prompting further investigation and documentation on the PDF form.
Hypothermia, defined as a temperature below 95°F (35°C), also requires immediate attention and detailed recording.
- Measurement method (oral, rectal, axillary) impacts normal ranges.
- Individual variations can occur; consistent monitoring is key.
Normal Pulse Rate Ranges
A vital signs record sheet PDF generally indicates a normal resting pulse rate for adults falls between 60 and 100 beats per minute (bpm).
However, factors like age, fitness level, medication, and emotional state can influence this range, necessitating careful observation and documentation.
Pulse rates consistently above 100 bpm (tachycardia) or below 60 bpm (bradycardia) warrant further assessment and notation on the PDF.
Key Points for Documentation:
- Record pulse rate alongside rhythm and strength.
- Note any irregularities observed during assessment.
Normal Respiratory Rate Ranges
A standard vital signs record sheet PDF typically defines a normal respiratory rate for adults as 12 to 20 breaths per minute.
Accurate respiratory rate assessment, documented on the PDF, is vital as deviations can signal underlying medical conditions.
Rates exceeding 20 breaths per minute (tachypnea) or falling below 12 (bradypnea) require further investigation and detailed charting.
Important Considerations for Recording:
- Note the depth and character of respirations.
- Document any labored breathing or use of accessory muscles.
Normal Blood Pressure Ranges
A comprehensive vital signs record sheet PDF generally indicates a normal blood pressure reading as less than 120/80 mmHg.
Systolic pressure (top number) represents the force during heart contraction, while diastolic (bottom number) reflects pressure between beats.
Consistent documentation on the PDF is crucial; readings above 130/80 mmHg may indicate hypertension, requiring clinical attention.
Key Points for Accurate Recording:
- Record blood pressure in mmHg.
- Note the arm used and patient position.
Normal Oxygen Saturation Ranges
A standard vital signs record sheet PDF typically defines a normal oxygen saturation (SpO2) range as 95% to 100%.
This percentage indicates the amount of oxygen carried by red blood cells, crucial for tissue function.
Values below 90% suggest hypoxemia, potentially requiring supplemental oxygen, and should be meticulously documented on the PDF.
Important Considerations for Documentation:
- Note if the patient is on supplemental oxygen.
- Record the method of SpO2 measurement (pulse oximetry).

Advanced Features in Vital Signs Tracking
Modern vital signs record sheet PDFs increasingly incorporate Early Warning Scores (EWS) and trend analysis charts for proactive patient risk assessment.
Automated alerts for abnormal values enhance timely intervention.
Early Warning Scores (EWS)
Early Warning Scores (EWS), integrated into some vital signs record sheet PDFs, are physiological scoring systems designed to detect subtle deterioration in a patient’s condition.
These scores assign points based on deviations from normal ranges in vital signs – respiration rate, oxygen saturation, temperature, blood pressure, pulse rate, and level of consciousness.
A rising EWS triggers escalating levels of clinical response, ensuring prompt intervention and potentially preventing adverse events.
Utilizing EWS within a standardized PDF streamlines the identification of at-risk patients, improving patient safety and outcomes.
Key Benefits:
- Facilitates early detection of deterioration.
- Standardizes response to patient risk.
Trend Analysis Charts
Many advanced vital signs record sheet PDFs incorporate trend analysis charts to visually represent changes in a patient’s physiological data over time.
These charts plot vital signs – temperature, pulse, blood pressure, and respiration rate – allowing clinicians to quickly identify patterns and deviations from baseline.
Visualizing trends aids in assessing the effectiveness of interventions and predicting potential complications.
The integration of charts within a PDF format enhances data interpretation and supports informed clinical decision-making, improving overall patient care.
Benefits of Charts:
- Facilitates pattern recognition.
- Supports proactive intervention.
Automated Alerts for Abnormal Values
Modern vital signs record sheet PDFs, particularly those integrated with digital systems, often feature automated alerts for abnormal values.
These systems are programmed with pre-defined normal ranges for each vital sign, triggering notifications when measurements fall outside these parameters.
Such alerts prompt immediate clinical attention, potentially preventing adverse events and improving patient safety.
This functionality streamlines workflow and ensures timely intervention, especially crucial in fast-paced healthcare settings, enhancing the utility of the PDF template.
Alert System Advantages:
- Enhances patient safety.
- Improves response time.
Legal and Ethical Considerations
Vital signs record sheet PDFs necessitate adherence to patient confidentiality and accurate record-keeping practices.
Proper documentation, as outlined in procedures, is legally required and ethically vital for quality patient care.
- Maintain patient privacy.
- Ensure documentation accuracy.
Patient Confidentiality
Vital signs record sheet PDFs contain sensitive patient health information, demanding strict adherence to confidentiality protocols.
Healthcare professionals must safeguard this data, complying with regulations like HIPAA, preventing unauthorized access or disclosure.
Secure storage of both physical and digital PDF copies is paramount, alongside responsible data handling practices.
Access should be limited to authorized personnel only, ensuring patient privacy is consistently protected throughout the documentation process.
- Never share patient data without proper authorization.
- Utilize secure systems for storing PDF documents.
Accurate Record Keeping
Maintaining precise records on vital signs record sheet PDFs is fundamental to quality patient care and legal defensibility.
All entries must be factual, legible, and promptly documented, avoiding alterations or assumptions.
Utilizing standardized PDF templates promotes consistency, minimizing errors and facilitating clear communication among healthcare providers.
Proper documentation supports informed clinical decision-making and ensures a comprehensive patient health history is readily available.
- Double-check all measurements before recording them on the PDF.
- Use approved abbreviations and terminology.
Proper Documentation Procedures
When utilizing a vital signs record sheet PDF, adhere to established protocols for accurate and complete documentation.
Always date and time each entry, and initial or sign to verify authorship.
Record all measurements objectively, noting any deviations from normal ranges or unusual observations.
If corrections are necessary, draw a single line through the error, initial, and write the correct value – never obliterate original data.
Essential Steps:
- Follow facility-specific guidelines for PDF form completion.
- Ensure the PDF is securely stored and accessible.