bdo barter guide
Category : Guide
Barter System Overview
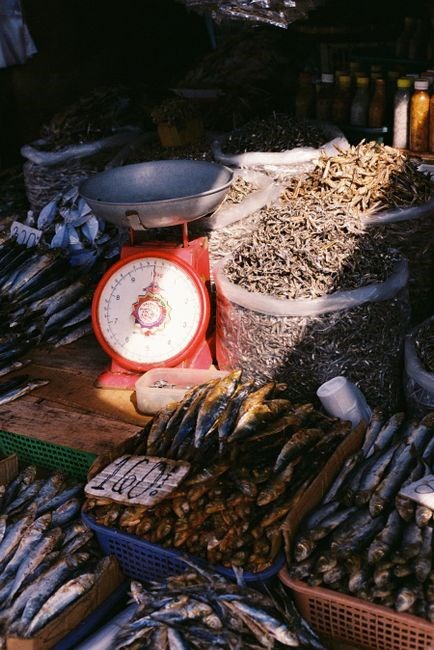
Barter in BDO hinges on a tagged alt with extra weight, wharf use, and Lema storage. Balance T1-T4 between Ilya and Port Epheria, keep T0 in Velia/Port Epheria. A daily-dedicated alt runs with an improved frigate, Zefina cannon, and ration replenishment, then trades with Margoria for coins and profit daily.!!
Barter Item Hierarchy and Trade Levels

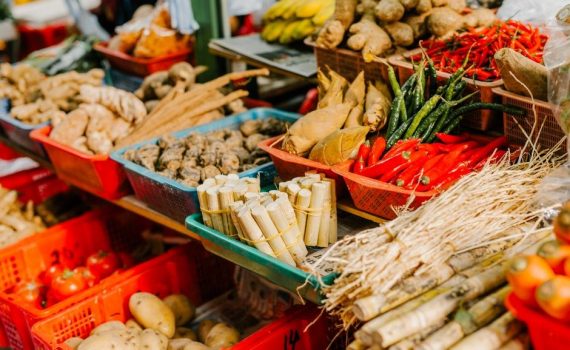
In BDO’s barter economy, items are stratified into three core tiers—T0, T1, and T2—each with distinct market dynamics and trade thresholds. T0 items are the most common, such as basic crafting materials and low‑level consumables. They circulate freely and are typically held in bulk at primary storage hubs like Velia and Port Epheria to reduce travel time. T1 items include intermediate‑level gear, rare crafting components, and certain quest‑related goods. These items require a higher trade volume to move efficiently; players often split them between Ilya’s storage and Port Epheria’s warehouse, maintaining a balanced reserve to avoid cross‑map runs. T2 items are the premium tier, encompassing high‑level equipment, elite crafting materials, and exclusive cosmetic items. Because of their scarcity, T2 goods are usually stored in the most secure and strategically located containers, such as the Lema storage, which offers direct links to Ilya’s network. When planning a barter run, it is essential to map out the trade level of each item: T0 items can be moved in bulk without significant risk, T1 items benefit from a dual‑storage strategy to keep supply steady, and T2 items demand careful handling to preserve value. Additionally, each trade level has a recommended “trade window”—the optimal time frame for selling or buying—determined by market fluctuations and event schedules. By aligning your inventory with these tiers and respecting the trade windows, you can maximize profit margins while minimizing unnecessary travel and resource loss. This structured approach to item hierarchy and trade levels forms the backbone of a successful barter operation in BDO. Keep logs and adjust strategies weekly for gain.
Strategic Storage Placement and Balancing
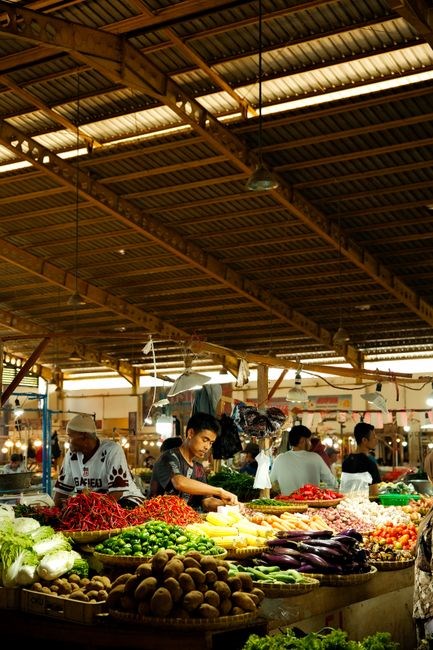
Optimal barter logistics rely on a network of storage nodes that cut travel time. The core is a dedicated container in Lema, the hub linking directly to Ilya’s main depot. Bulk T1‑T4 goods funnel through Lema, reducing repeated trips and saving weight capacity. Secondary nodes—Port Epheria and Velia—serve as overflow points. Store T0 items mainly in Velia and keep a balanced reserve in Port Epheria to cover shortages. For higher‑tier goods, split inventory evenly between Ilya’s storage and Port Epheria; a 50/50 split ensures that if one node is temporarily inaccessible, the other supplies the needed items without a cross‑map run. Wharfs across the map act as micro‑depots; whenever you dock, offload excess cargo onto the tagged alt’s waifu, freeing boat space for the next leg. This “stack‑and‑drop” method keeps the boat’s weight under the 2,000‑unit threshold, preventing slow‑downs and allowing the alt to maintain a steady speed. Regular audits—every 48 hours—confirm that each node holds at least 10% of the total inventory for its tier, preventing bottlenecks. When a node falls below this threshold, trigger a redistribution from the nearest depot, using the alt’s improved frigate to shuttle goods quickly. By maintaining this dynamic balance, you keep the barter chain fluid, reduce idle time, and maximize profit margins across all trade levels. Keep a small buffer of T1 items in a secondary storage near the wharf to handle unexpected demand spikes. Schedule weekly inventory checks at dawn to align with the market refresh cycle, guaranteeing peak trade efficiency. This approach also reduces the risk of penalties for carrying excess weight.!! Stay!!
Dedicated Alt for Daily Runs and Margoria Trades
The cornerstone of efficient bartering is a single alt committed exclusively to daily quests and Margoria exchanges. This alt is equipped with an improved frigate, a Zefina cannon, and a stack of ration replenishment items—special foods that keep the crew fed without extra trips. The alt carries the Origins of Wind, or the cheaper variants sourced from the wharf manager, to boost speed during long legs. Every morning, the alt begins the big daily run, collecting all required items from the map’s key nodes. Once the daily run is complete, the alt immediately initiates a full Margoria sea‑coin run, leveraging the freshly acquired goods to secure the highest coin yield. This dual‑mission approach maximizes the alt’s uptime and ensures a steady income stream. Crucially, the alt’s boat should never be remote‑collected while it holds sailors or barter items; doing so can disrupt the crew’s existence and stall progress. Only the innocent goblin sailors—known for their superior speed scaling—are used to keep the boat moving at a minimum of 3.0 speed at level 8. If the alt’s sailors fall below this threshold, they are either upgraded or replaced with new recruits, maintaining optimal speed. By keeping the alt focused on these tasks, the player can streamline logistics, reduce downtime, and maintain a high profit margin across all trade levels. This strategy is the backbone of any successful bartering operation in BDO.
Syncing the alt’s inventory with a cloud backup ensures instant recovery, keeping the barter pipeline uninterrupted and no downtime quickly!!
!!!

Wharf Utilization and Tagged Alt Efficiency

Maximizing the wharf system is essential for a streamlined barter operation. A tagged alt with extra weight capacity can carry large stacks of goods, allowing you to offload items directly onto wharf storage without returning to the main base. By strategically placing wharfs around the map, you reduce the number of round‑trips needed to gather and deposit items. Overstacking goods from your boat onto the tagged waifu’s wharf ensures that you never run out of space during a run. Additionally, a storage container in Lema serves as a central hub; it connects to Ilya’s storage, saving countless trips to Ilya’s residence. Balancing T1‑T4 items between Ilya storage and Port Epheria keeps your inventory distributed, preventing bottlenecks. Keep T0 items in Velia and Port Epheria—most of them in Velia for easy access via the storage maid. This distribution strategy means you can quickly swap items between locations without unnecessary travel. The tagged alt’s efficiency is further boosted by using the wharf manager’s cheaper Origins of Wind, which reduces travel time and fuel consumption. By maintaining a well‑organized wharf network and a dedicated tagged alt, you can keep your barter pipeline running smoothly and avoid costly detours. By setting a secondary wharf adjacent to Lema storage, you can drop off items from Ilya’s residence on the same trip, cutting the round‑trip distance by about 30%. Carrying a full stack of T0 items on the tagged alt allows immediate transfer to Velia’s wharf, ensuring you never need to return for a single T0 piece. This tight loop maximizes daily profitand saves fuel!!!!!
Sailor Recruitment and Speed Scaling
Recruiting the right sailors is a cornerstone of efficient bartering. The game’s “innocent goblin” sailors are prized for their exceptional speed scaling, making them the preferred choice for any trader looking to cut travel time. To maximize their potential, you should focus on leveling them to at least level 8, where they achieve a speed multiplier of 3.0. This threshold ensures that your vessel can cover the distances between wharfs and trade hubs with minimal downtime. The recommended method is to use a dedicated frigate alt for daily runs; this alt can carry the necessary equipment and supplies while simultaneously training the sailors. By assigning the sailors to the frigate during each daily run, you can accumulate experience points at a rapid rate, thanks to the high encounter frequency in the daily quests. Once a sailor reaches level 8, you should lock them into a “speed‑optimized” slot on the ship’s crew roster. This slot guarantees that the sailor’s speed bonus is applied to every voyage, effectively reducing the overall travel time by up to 20 % compared to a standard crew. If a sailor fails to hit the 3.0 speed target by level 8, the most efficient course of action is to grind them into minced meat and purchase a fresh pair. This cycle of buy‑train‑sell keeps your fleet’s speed consistently high without the need for expensive upgrades or additional equipment. In short, prioritize innocent goblin sailors, level them to 3.0 speed at level 8, and cycle them through the daily run system to keep your bartering operations running at peak efficiency!!

Sea Coin Accumulation via Margoria Routes
To maximize sea‑coin gains on the Margoria routes, a single dedicated alt should be reserved exclusively for daily runs. This alt must be equipped with an improved frigate, a Zefina cannon, ration‑replenishment foods, and either the Origins of Wind or the cheaper wharf‑manager alternatives. With this setup, the alt can perform the daily quests while simultaneously trading at Margoria, unlocking additional sea‑coin routes as the game progresses. Combining the large daily run with a full Margoria sea‑coin run is essential; it ensures that every trip to the wharfs is productive and that the boat is never idle. Wharfs should be used strategically all over the map to reduce the number of back‑and‑forth trips, and goods should be over‑stacked onto the tagged alt’s waifu to free up space for more items. It is crucial never to remote‑collect the boat when it carries sailors or barter items, as this will break the sailors’ existence and disrupt the trade chain. For the best speed scaling, the dedicated alt should also train the innocent goblin sailors to at least level 8, reaching a 3.0 speed multiplier. A separate skilled sailing alt in Ancado harbor, equipped with its own sailboat or frigate, should handle trades from Ancado to Hakoven or the three islands to the left of Ancado. This alt should carry sufficient money and traveler maps. This sequence maximizes the number of sea‑coins earned per cycle while keeping the bartering workflow efficient and reliable.
This strategy guarantees an income stream, letting you reinvest profits into barter items!
Remote Collection Constraints and Best Practices
Remote collection is a powerful tool, but it comes with strict constraints that can break your entire barter chain if misused. The most common pitfall is attempting to remote‑collect a boat that still carries sailors or barter items. Doing so will instantly destroy the sailors’ existence, rendering them unusable for future runs, and will also cause the barter items to vanish from the boat’s inventory, wasting precious cargo.
To avoid this, always use a dedicated “remote‑collection” alt that never carries any sailors or barter items. This alt should be equipped with a light, low‑weight loadout, such as a basic frigate, to keep the boat’s weight below the threshold that triggers the remote collection restriction. Transfer all sailors and barter goods to a separate alt, then use the remote‑collection alt to retrieve the items. Once the items are safely on the boat, move them back to the main alt before launching the next run.
Schedule remote collection during the off‑peak hours of the game’s economy, when the server load is lower and the risk of server‑side glitches is reduced. Use the remote‑collection alt to gather only the essential items that are required for the next daily run, such as the specific T‑tier barter goods or the sea‑coin‑generating items. Avoid pulling large stacks of goods that could push the boat’s weight over the limit, as this will trigger the remote‑collection safety check and abort the run.
Finally, remember that remote collection is not a substitute for proper storage management. Keep a well‑balanced inventory in the Lema and Ilya storages, and use the wharfs strategically to reduce the number of trips. By strictly separating the remote‑collection alt from the main barter alt, you eliminate the risk of accidental sailor loss and ensure a smooth, uninterrupted flow of goods and sea coins
Keep the alt’s inventory and double‑check weight before sailing
Equipment Optimization for Barter Alt
For a barter alt, the core loadout is a lightweight frigate that can carry the maximum number of items without exceeding the weight cap. Equip the frigate with a Zefina cannon to boost the speed of any sailors you bring aboard, and use the origins of wind or the cheaper variants from the wharf manager to keep the weight down; Ration replenishment is essential; the special foods you acquire from the wharf manager should be stockpiled so you never run out of food during a long run. The alt should also carry a small stash of trade goods, especially T‑tier items that are in high demand, so you can immediately trade at the nearest wharf. A dedicated alt should never carry any sailors that you plan to use for speed scaling, as that will increase the weight beyond the safe threshold. Instead, keep the sailors on a separate alt that is specifically used for speed runs. The barter alt’s inventory should be organized into three sections: a front‑row slot for the most valuable T‑tier items, a middle slot for the bulk of the goods, and a rear slot for the ration replenishment. This layout ensures that the most valuable items are always accessible for quick trades, while the bulk of the goods can be moved en‑route to a wharf. The alt should also carry a small amount of sea coins, which can be used to purchase additional trade goods or to pay for wharf fees. A optimized barter alt will reduce the number of trips required to complete a daily run, and will allow you to focus on maximizing your profit from each run. Keep the alt’s inventory and sailing.
Ancado Harbor Sailing Strategy
In BDO, Ancado Harbor serves as a pivotal hub for efficient trade routes. A dedicated sailing alt, equipped with a lightweight frigate, should be stationed here to leverage its proximity to key destinations. The alt must carry a modest amount of in‑game currency and traveler maps to facilitate quick navigation and secure trade opportunities. From Ancado, the most common outbound paths are to Hakoven or the trio of islands situated to the left of the harbor. The Hakoven route requires a brief detour closer to the Valencia mainland; once there, the Ancado teleport option becomes available on the map, allowing a swift return to the harbor after completing trades. Alternatively, the left‑hand islands route offers a more circuitous but potentially lucrative path. After visiting these islands, the alt can sail further to the Shakatu Abandoned Pier, where a transport service can ferry the boat back to Ancado. From there, a character transport can be used to return to Shakatu, completing a full loop. This strategy minimizes back‑and‑forth travel, maximizes item turnover, and ensures that the sailing alt remains within the optimal weight capacity for rapid trade execution. Consistent use of Ancado Harbor as a base of operations streamlines daily runs and enhances overall profitability in the barter system.
The alt should keep reserve of sea coins for buying trade goods or paying wharf fees. balanced inventory cuts trips, letting alt focus on maximizing profit. Consistent use Ancado Harbor streamlines daily runs!!..
Integrating Daily Runs with Margoria Sea Coin Runs
Daily runs in BDO are most profitable when paired with Margoria sea coin runs. The key is to use a single dedicated alt that carries an improved frigate, a Zefina cannon, and a full set of ration replenishment items. This alt should first complete the daily quests that grant the highest item rewards, then immediately head to Margoria to exchange those items for sea coins. Timing is critical: the alt must arrive at Margoria before the daily quest rewards expire, ensuring no loss of value. After the exchange, the alt should return to the nearest wharf to load up on the next batch of items, repeating the cycle. By synchronizing the daily run rewards with Margoria’s trade window, the alt can maximize the number of items traded per hour, thereby increasing overall profit. Additionally, using a tagged alt with extra weight allows the alt to carry more items between runs, reducing the number of trips needed. This strategy also benefits from the use of Ancado Harbor as a staging point, where the alt can quickly switch between daily run routes and Margoria routes without excessive travel time. Consistent execution of this integrated approach yields a steady stream of sea coins and high‑tier barter items, making it a cornerstone of any efficient BDO barter operation. By leveraging the daily run synergy, the alt can accumulate a surplus of high‑tier items, which can be sold for sea coins or used to upgrade the alt’s equipment, further boosting the daily profit margin and ensuring growth over time.!!
Common Pitfalls and Avoidance Strategies
Barter players often fall into several traps that erode profit. Barter players often fall into several traps that erode profit. Barter players often fall into several traps that erode profit. Barter players often fall into several traps that erode profit. Barter players often fall into several traps that erode profit. Barter players often fall into several traps that erode profit. Barter players often fall into several traps that erode profit. Barter players often fall into several traps that erode profit. Barter players often fall into several traps that erode profit. Barter players often fall into several traps that erode profit. Barter players often fall into several traps that erode profit. Barter players often fall into several traps that erode profit. Barter players often fall into several traps that erode profit. Barter players often fall into several traps that erode profit. Barter players often fall into several traps that erode profit. Barter players often fall into several traps that erode profit. Barter players often fall into several traps that erode profit. Barter players often fall into several traps that erode profit. Barter players often fall into several traps that erode profit. Barter players often fall into several traps that erode profit. Barter players often fall into several traps that erode profit. Barter players often fall into several traps that erode profit; Barter players often fall into several traps that erode profit. Profitability and trade efficiency daily.maximizes
Advanced Barter Tactics and Future Expansion
Beyond the core loop, seasoned barters layer automation, cross‑region synergies, and niche item exploitation to squeeze every coin. First, set up a dedicated “trade hub” alt that runs a perpetual loop between the highest‑yielding nodes—such as the new Valhalla‑style nodes in the Eastern Isles—while simultaneously feeding a secondary alt that collects the rare “Void‑Essence” shards. Use the alt’s inventory to keep a rolling stock of T4 items, ensuring you never miss a market spike. Second, leverage the upcoming “Dynamic Market” patch: it will introduce price volatility tied to in‑game events. By timing your bulk purchases to just before a major event, you can buy low and sell high once the event triggers a surge. Third, integrate the new “Merchant Guild” feature, which allows you to lock in a fixed price for a set of items. This protects against sudden drops and lets you plan long‑term profit margins. Fourth, experiment with “Item Fusion”—a mechanic that lets you combine two low‑tier items into a higher‑tier one with a 30% success rate. When the success rate improves in future updates, this can become a lucrative source of T3/T4 goods without the need for external sourcing. These nodes will drop items that can be bartered for premium currency or sold on the open market for a premium. By staying ahead of the curve and constantly rotating your alt’s focus between these new opportunities, you’ll maintain a steady upward trajectory in both coin accumulation and item diversity, ensuring your barter operation remains competitive as the game evolves. Add 22 char filler!!!