wholly gluten free pie crust instructions
Category : Instructions
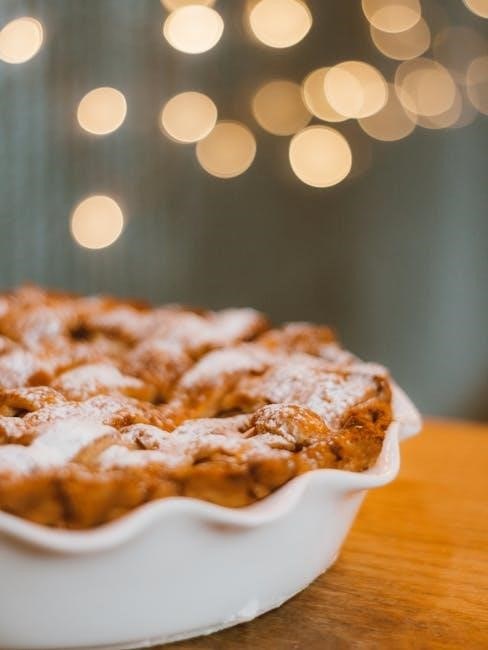
Discover the secret to a tender, flaky gluten-free pie crust, perfect for sweet and savory fillings․ Easy to handle and bake, it rivals traditional crusts in texture and flavor;
Overview of Gluten-Free Baking
Gluten-free baking requires careful selection of ingredients to achieve the right texture and structure․ Unlike traditional baking, it often involves blending multiple flours and additives to mimic gluten’s elasticity․ This approach ensures that baked goods, like pie crusts, remain tender and flaky without sacrificing flavor․ With the right combination of gluten-free flours and fats, bakers can create crusts that are both durable and delicious, perfect for sweet or savory fillings․ This method has become increasingly popular, offering inclusive options for all bakers․
Importance of a Good Pie Crust
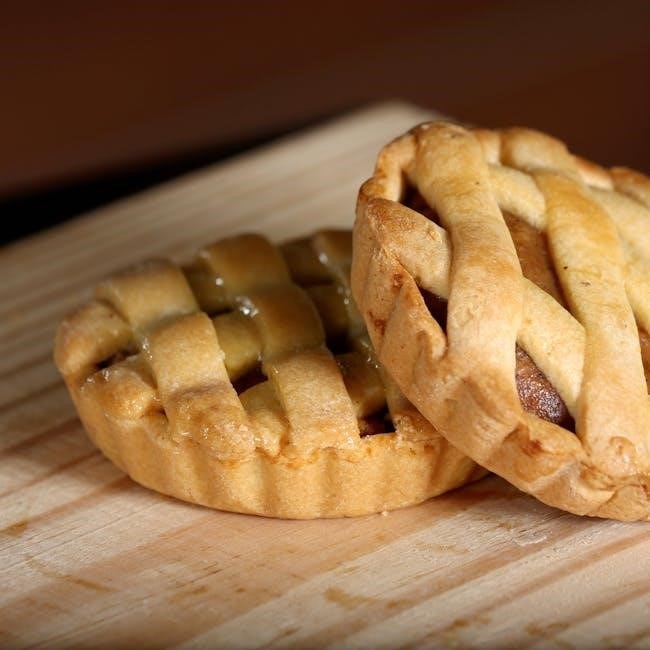
A good pie crust is the foundation of a memorable pie, providing structure, texture, and flavor․ It enhances both sweet and savory fillings, creating a balanced and appealing dish․ A well-made crust ensures the filling is contained and cooked evenly, while its texture adds to the overall enjoyment․ Whether buttery, flaky, or tender, a quality crust elevates the pie experience, making it a standout in any meal or dessert․
Benefits of a Wholly Gluten-Free Pie Crust
A wholly gluten-free pie crust offers versatility for both sweet and savory pies, ensuring accessibility for gluten-sensitive individuals while maintaining a tender, flaky texture everyone will enjoy․
Health Benefits for Gluten-Sensitive Individuals
A wholly gluten-free pie crust eliminates gluten, preventing discomfort and digestive issues for those with gluten sensitivity or celiac disease․ It promotes better digestion and overall well-being, making it a safe and enjoyable option for individuals with dietary restrictions․ By using gluten-free flours, the crust ensures that everyone can savor delicious pies without compromising their health․ This option is particularly beneficial for those who need to avoid gluten entirely while still enjoying homemade treats․
Versatility for Sweet and Savory Pies
A wholly gluten-free pie crust offers unmatched versatility, catering to both sweet and savory creations․ From classic fruit pies to hearty pot pies, it adapts seamlessly to any filling․ The crust’s buttery, flaky texture complements sweet ingredients like berries or chocolate, while its neutral flavor pairs perfectly with savory fillings such as chicken or vegetables․ This adaptability makes it a reliable choice for any pie lover, ensuring delicious results every time without compromising on taste or texture․
Essential Ingredients for Gluten-Free Pie Crust
Essential ingredients for a wholly gluten-free pie crust include a mix of gluten-free flours, fats, liquids, and additives, each crucial for achieving a perfect flaky and tender texture․
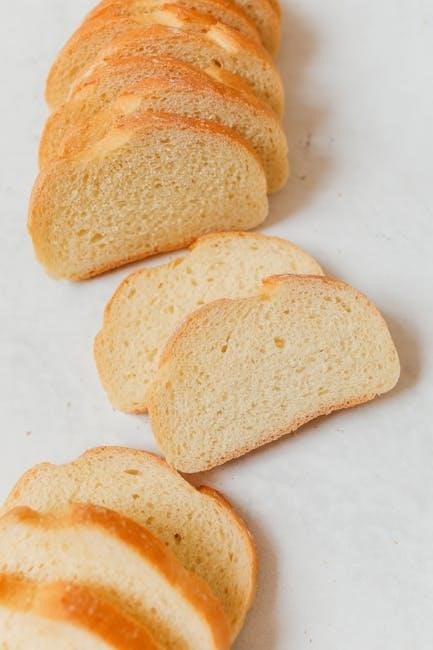
Gluten-Free Flours (Rice, Oat, Millet)
A blend of rice, oat, and millet flours creates a balanced gluten-free pie crust․ Rice flour adds lightness and crispness, while oat flour contributes softness and structure․ Millet flour enhances flavor and texture, ensuring a tender, flaky crust without the need for xanthan gum․ This combination provides the perfect base for both sweet and savory pies, delivering a crust that rivals traditional wheat-based versions in taste and texture․
Fats (Butter, Dairy-Free Alternatives)
Fats are essential for a flaky, tender crust․ Butter adds richness and flavor, while dairy-free alternatives like coconut oil or vegan butter ensure inclusivity․ These fats create layers in the dough, resulting in a light, buttery texture․ For a vegan option, chilled coconut oil or plant-based butter substitutes work perfectly, maintaining the crust’s structure and flavor without dairy․ Properly incorporating fats ensures a golden, delicious crust for both sweet and savory pies․
Liquids (Water, Egg, or Vegan Substitutes)
Liquids are crucial for binding gluten-free ingredients․ Water hydrates the dough, while eggs add richness and structure․ For vegan options, flaxseed or applesauce substitutes work beautifully․ These liquids ensure the crust holds together without gluten, creating a flaky, tender texture․ Properly balancing liquids prevents the dough from becoming too dry or sticky, ensuring it rolls out smoothly․ Whether using water, egg, or vegan alternatives, the right liquid ensures a golden, delicious crust for both sweet and savory pies․
Additives (Salt, Sugar, Xanthan Gum)
Additives enhance flavor and texture in gluten-free pie crusts․ Salt brings out flavors, while sugar adds sweetness for sweet pies․ Xanthan gum, optional in some recipes, helps bind ingredients without gluten․ Some recipes omit xanthan gum, relying on flours like sweet rice or oat for structure․ These additives balance the crust’s taste and texture, ensuring it’s flaky and cohesive․ Whether sweet or savory, they play a key role in achieving a delicious, professional-quality crust․
Equipment Needed for Making Pie Crust
Essential tools include a mixer for blending ingredients, a rolling pin for shaping the dough, and a baking dish for perfectly baking the crust, ensuring a flaky texture․
Mixers and Tools
A stand mixer or hand mixer simplifies blending ingredients evenly, while a pastry blender or fork helps cut fats into flour for a flaky texture․ A rolling pin is essential for shaping the dough into a uniform thickness, and a lightly floured surface prevents sticking․ Additionally, a baking sheet lined with parchment paper is ideal for chilling the dough before rolling, ensuring it holds its shape and bakes evenly․ These tools make crafting a gluten-free crust effortless and professional․
Rolling Out the Dough
Rolling out gluten-free dough requires a gentle touch to maintain its structure․ Lightly flour your surface and roll from the center outward, ensuring even thickness․ Rotate the dough occasionally to achieve a uniform circle․ Use parchment paper to prevent sticking and make transferring easier․ A rolling pin with a light touch helps avoid tearing, while a consistent motion ensures the crust remains intact․ This step is crucial for achieving a smooth, even base for your pie, whether sweet or savory․
Baking Essentials
Preheat your oven to 375°F (190°C) for optimal baking results․ Line your pie dish with parchment paper to prevent sticking and ensure easy removal․ Use pie weights or dried beans to hold the crust in place during blind baking․ Bake for 15-20 minutes, or until lightly golden․ For filled pies, adjust baking time based on filling instructions․ A preheated oven and proper tools like a pie shield or foil edges can prevent over-browning, ensuring a perfectly baked crust every time․
Step-by-Step Instructions
Learn to craft a gluten-free pie crust with simple steps: mix, chill, roll, and bake․ Achieve a flaky, tender texture using easy-to-follow instructions for perfect results․
Preparing the Ingredients
Start by gathering gluten-free flours like rice, oat, or millet․ Measure accurately for consistency․ Sift to remove lumps and ensure even distribution․ Chill fats like butter or dairy-free alternatives until firm․ Keep liquids, such as water or egg, ready․ Additives like salt or sugar should be pre-measured․ Ensure all ingredients are at room temperature unless specified․ This step sets the foundation for a smooth dough-making process, ensuring flaky and tender results in your gluten-free pie crust․
Mixing the Dough
Combine gluten-free flours, salt, and any additives in a bowl․ Cut in chilled fats until the mixture resembles coarse crumbs․ Gradually add liquids, mixing until a dough forms․ Avoid overworking to maintain flakiness․ Use a pastry cutter or fingers to blend fats evenly․ If using egg, incorporate gently․ Check consistency; adjust with more flour or liquid if needed․ Wrap dough in plastic and chill before rolling․ This step ensures a tender, buttery crust perfect for both sweet and savory pies․
Chilling the Dough
Chill the gluten-free dough in the refrigerator for at least 30 minutes to allow the flours and fats to relax, ensuring easier rolling․ Wrap tightly in plastic wrap to prevent drying․ If time permits, chill for up to 2 hours for optimal results․ Avoid overworking the dough before chilling, as this can lead to a tough crust․ Chilled dough can also be stored for up to 3 days or frozen for later use, making it convenient for meal prep or future baking projects․
Rolling Out the Crust
Place the chilled dough on a lightly floured surface or parchment paper, dusting with rice flour to prevent sticking․ Roll gently but firmly, starting from the center and working outward․ Use a rolling pin to achieve an even thickness, about 1/8 inch․ If the dough cracks, gently press it back together without overworking․ Transfer the rolled crust to a pie dish, trimming edges to fit․ Crimp or flute the edges for a decorative finish, ensuring a secure seal for fillings․
Blind Baking (Pre-Baking)
Pre-bake the crust for fillings that don’t require cooking, like puddings or creams․ Line the crust with parchment paper, fill with pie weights, and bake at 375°F for 15-20 minutes․ Remove the weights and parchment, then bake for an additional 5-10 minutes until lightly golden․ This step ensures the crust is set and prevents sogginess․ For gluten-free crusts, this method is especially important to achieve a sturdy, flaky base that holds up beautifully to any filling;
Cooling the Crust
Allow the baked crust to cool completely on a wire rack to ensure it sets properly and maintains its structure․ Cooling prevents sogginess and helps the crust retain its flaky texture․ For pre-baked crusts, let them cool before adding fillings to avoid a soggy base․ This step is crucial for both sweet and savory pies, ensuring the crust stays crisp and holds up beautifully when served․ Proper cooling enhances the overall texture and presentation of your gluten-free pie․
Tips for a Flaky and Tender Crust
Master the art of a flaky and tender gluten-free pie crust with gentle handling, precise ingredient ratios, and minimal dough manipulation for a perfect texture every time․
Handling the Dough
Handle the dough gently to avoid overworking, which can lead to a tough crust․ Keep the dough cold to maintain its structure and ensure flakiness․ Use a light touch when rolling to prevent tearing․ If the dough becomes too warm or sticky, refrigerate it for 10-15 minutes to firm up․ Always roll on a floured surface or parchment paper to prevent sticking․ Avoid over-stretching the dough when placing it in the pie dish, as this can cause shrinking during baking․ Refrigerating the dough before rolling enhances its pliability and reduces cracking․
Achieving the Perfect Roll
To achieve a perfect roll, ensure the dough is well-chilled and slightly softened․ Roll on a lightly floured surface or parchment paper, using steady, even strokes․ Start from the center and roll outward to maintain an even thickness․ Avoid over-rolling, as this can disrupt the flaky layers․ If the dough begins to crack, gently press it back together with your fingers․ For a uniform crust, aim for a thickness of about 1/8 inch․ This ensures even baking and a tender texture․
Troubleshooting Common Issues
If the crust is too crumbly, add a little more liquid․ If it’s too sticky, add a small amount of flour․ For shrinkage during baking, ensure the dough is well-chilled and consider using pie weights․ Cracks can be gently pressed back together before baking․ Overworking the dough can lead to toughness, so mix just until ingredients combine․ Adjusting these steps will help achieve a flaky, tender crust that holds together beautifully․
Vegan and Dairy-Free Options
Explore dairy-free substitutes like vegan butter or coconut oil for a tender, flaky crust․ Easily adapt the recipe to be vegan, ensuring a delicious, gluten-free result․
Substitutes for Butter and Dairy
For a vegan crust, replace butter with vegan butter or coconut oil․ Use almond, oat, or coconut milk as dairy-free alternatives․ These substitutes ensure a tender, flaky texture while maintaining flavor․ Experiment with combinations to achieve the perfect consistency․ Ensure the dough holds together by adjusting liquids slightly, as dairy-free fats can behave differently․ This approach allows everyone to enjoy a delicious, wholly gluten-free pie crust without compromising on taste or texture․
Ensuring the Crust Holds Together
To ensure a gluten-free crust holds together, use xanthan gum or natural binders like egg or flaxseed․ Handle dough gently to avoid breaking․ Chill thoroughly to firm fats, preventing crumbling․ Use the right ratio of flours for structure․ Blind baking with weights helps maintain shape․ Avoid overworking dough, as it can lead to cracking․ These steps ensure a sturdy, cohesive crust that bakes evenly and holds fillings perfectly, whether sweet or savory․

Freezing and Storage Instructions
Gluten-free pie crust dough can be frozen for up to 3 months in an airtight container․ Thaw overnight in the fridge or at room temperature for 30 minutes before use․ Store baked crusts in an airtight container at room temperature for up to 2 days or freeze for later use․ Proper storage ensures freshness and maintains texture․
Freezing the Dough
Gluten-free pie crust dough can be frozen for up to 3 months․ Wrap it tightly in plastic wrap or place in an airtight container․ For best results, divide the dough into portions before freezing․ When ready to use, thaw overnight in the fridge or let it sit at room temperature for 30 minutes․ Frozen dough retains its texture and flavor, making it a convenient option for future baking․ Proper freezing ensures freshness and ease of preparation․
Thawing and Using Frozen Crust
Thaw frozen gluten-free pie crust dough overnight in the fridge or at room temperature for 30 minutes․ Once thawed, the dough retains its texture and flavor, ready to roll out for baking․ This convenient method ensures freshness and simplifies meal preparation․ Perfect for bakers who prefer to plan ahead, frozen crusts offer flexibility without compromising quality or taste․
Serving Suggestions and Recipe Ideas
Enjoy your gluten-free pie crust with delicious sweet or savory fillings, from classic apple and pumpkin to hearty chicken pot pie or quiche․ Perfect for any occasion!
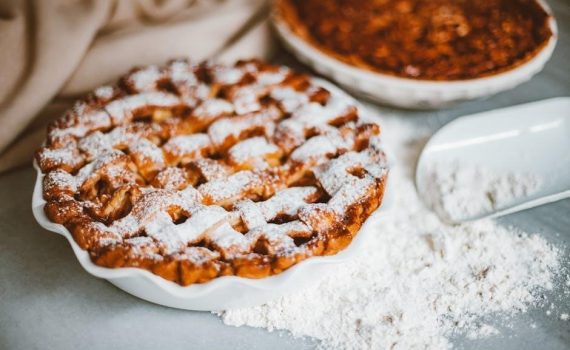
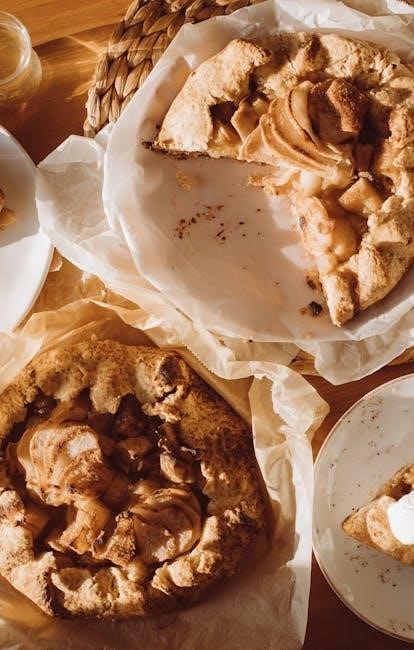
Sweet Pie Fillings
Indulge in classic fruit pies like apple or pumpkin, or try cherry, blueberry, or chocolate fillings․ The gluten-free crust pairs perfectly with sweet flavors, offering a tender base for creamy caramel or lemon meringue pies․ Whether you prefer traditional spices or modern twists, these fillings complement the crust’s buttery texture․ Perfect for desserts, they bring warmth and joy to any gathering, ensuring a delightful finish to every meal․
Savory Pie Fillings
Elevate your meals with hearty savory pies, perfect for main courses or sides․ Try classic chicken pot pie, rich with tender chicken and vegetables, or opt for a beef and mushroom filling․ Shepherd’s pie, with its layered ground meat and mashed potatoes, is another delicious option․ These fillings pair beautifully with the gluten-free crust, offering a satisfying, flaky base for comforting, flavorful dishes that cater to various tastes and dietary preferences․
Mastering a wholly gluten-free pie crust opens up a world of delicious possibilities․ Perfect for sweet and savory fillings, it’s tender, flaky, and surprisingly easy to handle․
Final Thoughts on Gluten-Free Pie Crust
A wholly gluten-free pie crust is a game-changer for bakers, offering a tender, flaky texture that rivals traditional crusts․ With over 1,000 five-star reviews, it’s proven to delight․ Perfect for sweet or savory pies, this crust is easy to handle and bake․ Its simplicity and versatility make it a staple for any kitchen․ Whether you’re gluten-sensitive or just exploring new recipes, this crust brings joy and satisfaction to every pie you create․
Encouragement to Experiment
Don’t be afraid to get creative with your gluten-free pie crust! With its tender, flaky texture and easy handling, it’s the perfect canvas for both sweet and savory fillings․ Try experimenting with different flavors, like adding herbs for a savory pie or cinnamon for a sweet one․ The simplicity of this recipe makes it a great base for innovation․ Share your creations and enjoy the joy of homemade pie, knowing it’s gluten-free and delicious for everyone․