3-way test kit instructions
Category : Instructions
3-way test kits are FDA-approved, portable devices designed to detect SARS-CoV-2 antigens, offering quick and reliable results for COVID-19 diagnosis. They combine convenience and accuracy, enabling individuals to monitor their health effectively during the pandemic.
1.1 Overview of 3-Way Test Kits
3-way test kits are designed for rapid detection of SARS-CoV-2 antigens, offering a quick and reliable method for COVID-19 diagnosis. These kits typically include a test device, swab, and reagents, providing an easy-to-use solution for home testing.
They are highly portable and convenient, enabling individuals to monitor their health effectively. The kits ensure accurate results when instructions are followed carefully, making them a vital tool in managing the pandemic.
1.2 Importance of Following Instructions
Following the instructions provided with 3-way test kits is crucial for accurate and reliable results. Properly collecting and handling samples ensures the test functions as intended.
Incorrect procedures can lead to false negatives or positives, potentially delaying diagnosis or treatment; Always read and follow the guidelines to maximize test performance and safety.
Preparing for the Test
Gather all necessary equipment, including the test kit, sterile swab, timer, and vial of liquid. Set up a clean, flat surface and wash your hands thoroughly.
2.1 Gathering Testing Equipment
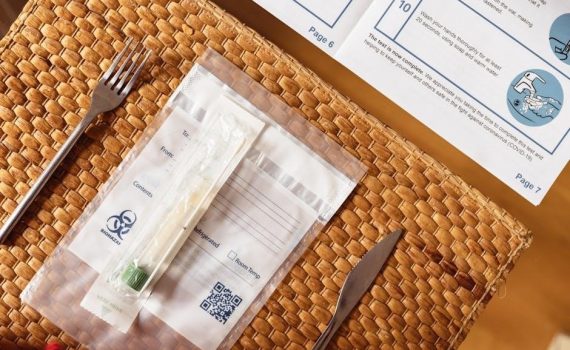
To ensure a smooth testing process, gather all components from the test kit, including the test device, sterile swab, vial of liquid, and test tube with a cap. Additional items like a timer and test tube rack (if provided) are essential. Verify that all materials are included and within their expiration dates. Organize these items on a clean, flat surface to maintain efficiency and avoid contamination. Proper preparation ensures accurate results and adherence to safety protocols.
2.2 Understanding Test Kit Components
The 3-way test kit includes a test device, sterile swab, vial of liquid (likely a buffer solution), test tube with cap, and a timer. The test device contains a strip for detecting antigens, while the swab is used for specimen collection. The vial of liquid is typically for diluting the sample. The test tube and cap are for preparing the specimen. Ensure all components are present and within their expiration dates before proceeding. Familiarizing yourself with each part ensures proper test execution and accurate results.
Test Preparation Steps
Begin by washing your hands and blowing your nose to ensure a clean sample. Prepare a flat, stable surface for the test area, following kit instructions carefully.
3.1 Washing Hands and Blowing Nose
Begin by washing your hands thoroughly with soap and water to remove any contaminants. Blow your nose gently to clear nasal passages, ensuring a clean sample collection. Avoid eating or drinking before testing, as this may interfere with the swab sample quality. Proper preparation helps maintain accuracy and reliability of the test results, making it essential to follow these steps carefully before proceeding with the test kit instructions.
3.2 Setting Up the Test Area
Choose a clean, flat surface for the test area, ensuring it’s free from clutter and contamination. Lay out all components, including the test device, swab, and vial of liquid. Open the test device and place it on the surface. Keep the timer nearby to monitor the 15-minute waiting period accurately. Proper organization enhances efficiency and reduces the risk of errors during the testing process, ensuring a smooth experience when following the test kit instructions.
Collecting the Sample
Insert the swab gently into the nostril, following the kit’s instructions. Collect the sample carefully and handle it properly to avoid contamination and ensure accurate results.
4.1 Inserting the Swab Correctly
Insert the sterile swab into the nostril at a slight angle, guiding it gently toward the back of the nasal passage. Rotate the swab slowly for 5-10 seconds to collect an adequate sample. Ensure the swab tip makes contact with the nasal mucosa to maximize accuracy. Avoid touching the swab tip to other surfaces to prevent contamination. Proper insertion and rotation are critical for obtaining a valid sample, which is essential for accurate test results and early detection of the virus.
4.2 Handling the Sample Properly
Avoid touching the swab tip to any surface after collection. Gently insert the swab into the provided vial, breaking the swab at the designated mark. Secure the vial cap tightly to prevent leakage. If using a test tube, ensure the swab is submerged in the liquid properly. Handle the sample gently to avoid splashing or spilling. Proper handling ensures the integrity of the sample, reducing contamination risks and ensuring accurate test results. Follow all safety precautions to maintain the reliability of the test outcome.

Executing the Test
Add the sample to the test device, start the timer, and wait for the results. This quick, at-home solution helps detect COVID-19 efficiently and accurately within minutes.
5.1 Adding the Sample to the Test Device
After collecting the sample, insert the swab into the test tube with the provided liquid. Ensure the swab is fully submerged, then break or twist it at the mark. Pour two to three drops of the mixture onto the test device’s sample well. Avoid touching the nozzle to the device to prevent contamination. Follow the kit’s instructions precisely for accurate results.
5.2 Using the Timer for Accurate Results
Set a timer immediately after adding the sample to the test device. Most kits require a 15-minute waiting period for results to develop. Do not read the results before the timer goes off, as this may lead to inaccurate interpretations. If the control line appears before the timer, wait until the allocated time has passed. Once the timer sounds, check the test lines to determine your result. Ensure you read the results within the specified time frame for optimal accuracy.

Reading and Interpreting Results
After the timer sounds, check for a visible control line (C) and test line (T). If both lines appear, the result is positive. Only the control line means negative. If no lines appear, the test is invalid. Always read results within the specified time frame for accuracy.
6.1 Understanding Test Lines and Their Meaning
The test device displays two lines: a control line (C) and a test line (T). The control line (C) appears if the test is valid, ensuring proper function. The test line (T) indicates the presence of SARS-CoV-2 antigens. If both lines appear, the result is positive. Only the control line means negative. No lines appearing indicates an invalid test. Timing is crucial, as results must be read within the specified window, typically 15 minutes, for accuracy. Always refer to the kit’s instructions for precise interpretation guidelines.
6.2 Common Mistakes to Avoid
Common mistakes include incorrect swab insertion depth, improper sample handling, and failure to follow timing instructions. Forgetting to wash hands or blowing the nose before testing can contaminate the sample. Not setting the timer accurately may lead to reading results too early or late, affecting accuracy. Always follow the kit’s instructions precisely, ensuring each step is completed as directed to avoid invalid results and ensure reliable outcomes. Proper technique is essential for accurate testing. Adhere to all guidelines provided.
Post-Test Procedures
Dispose of all used materials safely, following local guidelines. Store unused kits in a cool, dry place, ensuring they remain sealed and protected from tampering or damage.
7.1 Disposing of Test Materials Safely
Dispose of used test materials, including swabs and devices, in a sealed, biohazard bag. Ensure proper handling to prevent contamination and exposure. Follow local regulations for waste disposal. Unused kits should be stored in their original packaging, kept dry, and protected from direct sunlight; This ensures the integrity of the test components and prevents any potential environmental contamination. Proper disposal and storage are crucial for maintaining safety and effectiveness. Always refer to the provided instructions for specific guidelines.
7.2 Storing Unused Kits Properly
Store unused test kits in a cool, dry place, away from direct sunlight. Keep them in their original packaging to maintain integrity. Avoid extreme temperatures and humidity. Ensure the storage area is clean and secure, out of reach of children. Do not open or tamper with the kit before use. Proper storage ensures the components remain effective and accurate. Refer to the instructions for specific temperature ranges and handling guidelines to preserve the kit’s functionality and reliability over time.

Troubleshooting Common Issues
Common issues include the test line not appearing or kit malfunction. Check if instructions were followed correctly and ensure the kit is not expired. If problems persist, contact the manufacturer or use a new kit. Proper troubleshooting ensures accurate results and effective testing outcomes.
8.1 What to Do If the Test Line Doesn’t Appear
If the test line doesn’t appear, first verify that the test was performed correctly. Ensure the sample was collected and added properly, and the timer was used accurately. Check the expiration date of the test kit and confirm that all components were used as instructed. If the issue persists, repeat the test with a new kit or consult the manufacturer’s guidelines for further troubleshooting steps to resolve the problem effectively.
8.2 Resolving Issues with Test Kit Malfunction
If the test kit malfunctions, ensure all components are undamaged and expiration dates are valid. Verify that the test was performed according to the instructions, including proper sample collection and handling. If issues persist, contact the manufacturer’s customer support for assistance or request a replacement. Always follow the troubleshooting guide provided with the kit to address specific malfunctions effectively and ensure accurate test results.