Month: November 2025

a reference guide to surviving nature outdoor preparation and remedies

Category : Guide

Essential Outdoor Survival Skills

Navigating with a compass and map is crucial․ Starting a fire safely and efficiently is vital․ Building a sturdy shelter protects from harsh weather․ Finding and purifying water sources ensures hydration․ These skills are fundamental for outdoor survival․

1․1 Navigation and Orienteering

Navigating and orienteering are critical skills for outdoor survival․ mastered with map and compass․ Use a compass to determine direction and identify landmarks for guidance․ Maps provide details on terrain, trails, and water sources, helping you stay on course․ Practice using natural signs, like the North Star, to navigate without tools․ Always double-check your bearings and adjust for magnetic declination․ If lost, stay put and use smoked signals or bright objects to attract help․ Mastering these techniques ensures safety and confidence in the wild․

Using the sun’s position can help determine direction when no tools are available․ Marking landmarks and pacing regularly can prevent disorientation․ In challenging environments, stay calm and instincts to find your way․ Practice these skills before venturing out

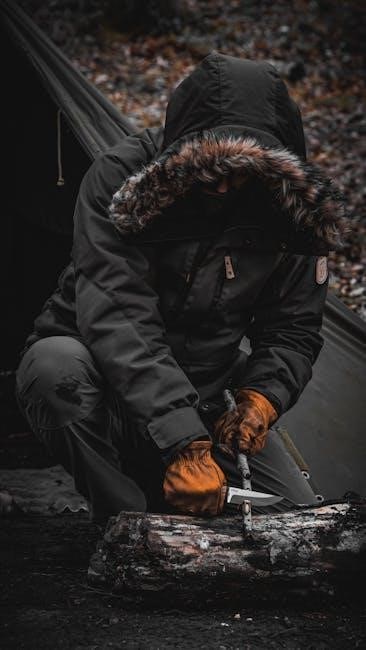
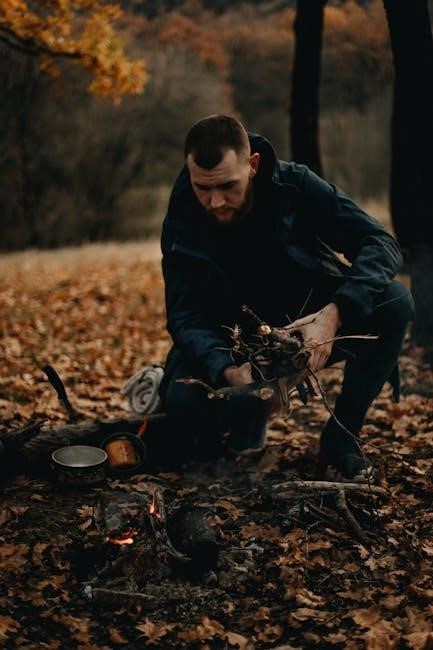
1․2 Starting and Maintaining a Fire

Starting and maintaining a fire is a critical skill for outdoor survival․ Always carry fire-starting tools like lighters, matches, or fire steel in your survival kit․ Choose a safe location, clear of debris, and protect it from wind․ Gather tinder, kindling, and fuel wood to build a reliable fire․ Maintain the fire by carefully adding kindling and larger combustibles as needed․

A fire serves multiple purposes: providing warmth, cooking food, purifying water, and signaling for help․ Learn to start fires in various conditions, such as wet environments or windy situations․ Always prioritize fire safety and avoid overloading the fire with too much fuel, as this can cause it to burn out quickly․ Practice these techniques regularly to ensure readiness in emergency situations․

1․3 Building a Shelter

Building a shelter is essential for survival in the wild․ Choose a safe location, away from hazards like falling debris or flood-prone areas․ Use natural materials such as branches, leaves, and vines to construct a sturdy shelter․ Build a framework to support the roof and walls, ensuring stability and protection from the elements․

Line the floor with insulating materials like pine needles or grass to stay dry․ Create an entrance that can be closed to trap warmth․ Practice constructing shelters in different terrains to adapt to various conditions․ Remember to secure your shelter against strong winds or heavy rain, and maintain it regularly to prevent collapse or damage․

1․4 Finding and Purifying Water

Finding and purifying water is a critical outdoor survival skill․ Start by locating natural water sources like streams, rivers, or lakes․ Use a clean container to collect water, ensuring it is free from visible debris․ If no running water is available, gather rainwater or look for water in natural depressions or wetlands․ Always prioritize finding a clean source to minimize contamination risks․

To purify water, boil it for at least 1 minute to kill harmful pathogens․ If boiling is not possible, use a portable water filter or add purification tablets․ Avoid drinking untreated water, as it may containborne illnesses․ Carry a water filtration system in your survival kit for on-the-go purification․ Remember, staying hydrated is essential for survival, so locate and purify water consistently while in the wild․

Outdoor Survival Preparation

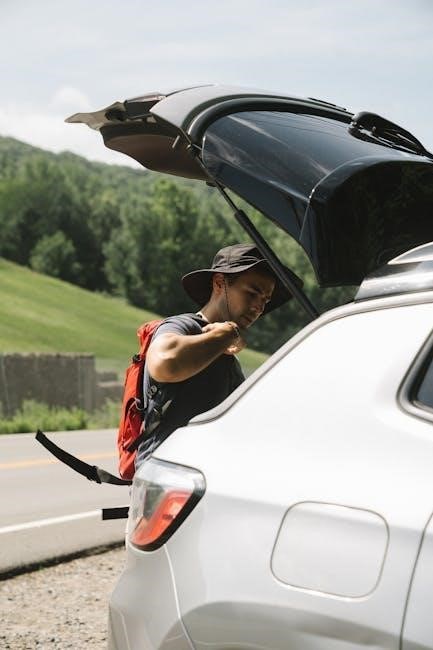
Packing a survival kit with essentials ensures readiness for unexpected situations․ Select gear suited to your environment and activity․ Prepare for weather extremes by including layers, rain gear, and insulation․ Carry emergency tools like a multi-tool, flashlight, and solar charger for communication and navigation․

2․1 Packing a Survival Kit

Packing a survival kit is crucial for outdoor adventures․ Include essentials like a multitool, first-aid kit, fire starter, and emergency blanket․ Add a solar charger to power devices like phones for communication․ Choose gear suited to your environment, such as hand warmers for cold climates or mosquito repellent for jungle settings․ Always test your preparedness in realistic scenarios to ensure you know how to use your kit effectively․

2․2 Selecting the Right Gear

Selecting the right outdoor gear ensures safety and comfort in various conditions․ Choose a reliable tent or tarp for shelter, along with durable clothing suited to the climate․ Opt for high-quality navigation tools, such as a compass and map, to avoid getting lost․ Include a headlamp or flashlight with extra batteries for visibility․ Prioritize gear that fits your specific environment, such as insulated clothing for cold climates or lightweight options for warmer regions․ Always carry a first-aid kit and essential tools like a multi-tool or knife․ Test your equipment beforehand to ensure it functions properly, reducing the risk of malfunctions in critical situations․

2․3 Weather Preparedness

Weather Preparedness

Staying informed about the weather is crucial for outdoor safety․ Always check forecasts before heading out and prepare for sudden changes․ Dress in layers to adapt to varying temperatures and protect against wind, rain, or snow․ Carry a lightweight compass and map to navigate in low visibility․ Waterproof your gear and pack an emergency shelter like a space blanket or bivy sack․ Stay dry by avoiding prolonged exposure to wet conditions and use a tarp or rainfly to stay protected․ Monitor humidity and temperature to prevent dehydration or heat-related issues․ By anticipating weather challenges, you enhance your ability to stay safe and comfortable in any environment․

2․4 Emergency Communication Tools

Incorporating reliable emergency communication tools into your outdoor preparation is essential․ Include a charged cell phone, equipped with a solar charger, to maintain connectivity during prolonged trips․ Carry a compact, water-resistant flashlight with extra batteries for visibility and signaling․ A whistle is a simple yet effective tool for attracting attention․ Additionally, pack a personal locator beacon or GPS-enabled device for emergencies in remote areas․ Prioritize testing these tools before your expedition and ensure they are easily accessible in your survival kit․ By integrating these communication tools into your preparation, you enhance your ability to stay connected and secure assistance when needed․

First Aid and Natural Remedies

Mastering first aid and natural remedies is crucial in outdoor survival․ Learn to treat wounds, recognize poisonous plants, and create healing poultices from available resources․ Knowing how to identify edible plants and use them for sustenance is also vital․ These skills ensure safety and well-being when help may be hours or days away․

3․1 Basic First Aid Techniques

Mastery of basic first aid is essential for outdoor survival․ Key techniques include cleaning and bandaging wounds to prevent infection, stopping bleeding by applying direct pressure, and immobilizing injured limbs to prevent further damage․ Learn to recognize signs of shock and how to keep a victim calm and comfortable․ Knowing how to treat burns, sprains, and minor injuries can mean the difference between life and death in remote environments․ Always carry a first aid kit with essential supplies and practice these skills regularly to ensure readiness in emergencies․

3․2 Identifying and Using Edible Plants

Identifying edible plants in the wild is a critical skill for survival․ Begin by learning to distinguish between safe and poisonous varieties through careful observation of plant features like leaves, stems, and flowers․ Start by testing a small portion of the plant to check for adverse reactions before consuming larger quantities․ Common edible plants include wild berries, dandelions, and cattails, which can provide essential nutrients and energy․ Always prioritize plants that you can confidently identify to avoid accidental poisoning․ When foraging, focus on areas with clean soil and away from toxic environments․ Using edible plants can supplement your food supply and help you sustain yourself in the wilderness․

3․3 Making Natural Painkillers and Healing Poultices

Natural painkillers and healing poultices can be created using plants found in the wild․ Willow bark tea, for example, contains salicin, a natural aspirin-like compound that reduces pain and inflammation․
For poultices, bruised plantain leaves or crushed mullein can be applied to wounds to soothe irritation and promote healing․
Additionally, mixing clay with warm water forms a cooling poultice that can ease swelling and discomfort․
When preparing these remedies, always ensure the plants are correctly identified and free from contaminants․
These natural solutions can provide temporary relief in the absence of modern medications, but seek professional medical help when possible․

3․4 Treating Common Outdoor Injuries

When injuries occur outdoors, prompt and proper treatment is essential․ Cuts and scrapes should be cleaned with water and dressed with clean cloth or bandages to prevent infection․
For sprains, elevate the injured area and immobilize it using a splint or makeshift support․
Burns can be cooled with water, and aloe vera or sterile ointment can soothe the affected skin․
Bleeding can be controlled using direct pressure while elevating the wound above heart level․
Snakebites require immobilization of the limb and avoiding unnecessary movement to slow venom spread․
Always carry a first aid kit and know how to use its contents effectively․
Natural remedies like yarrow for clotting or plantain for inflammation can complement basic first aid․
Stay calm, assess the situation, and prioritize safe evacuation to professional medical care when possible․

Psychological and Mental Preparation

Mentally prepare for survival by managing fear and anxiety․ Build resilience through adaptability and a positive mindset․ Stay calm under pressure by focusing on task prioritization․ Use natural remedies, like aromatic plants, to reduce stress․ Develop coping strategies to maintain mental stability in challenging situations․

4․1 Managing Fear and Anxiety in Survival Situations

Managing Fear and Anxiety in Survival Situations

In survival scenarios, fear and anxiety can impair judgment and hinder decision-making․ Managing these feelings is critical for maintaining focus and effectively addressing challenges․ Practice controlled breathing exercises to calm your mind and reduce panic․ Focus on the present moment, breaking tasks into manageable steps․ Avoid overthinking the situation or worst-case scenarios․ Develop a mental checklist to prioritize needs, ensuring clarity of thought․ Understanding your emotional responses and acknowledging your fears can help you regain control․ Trust in your preparedness and training to build confidence under pressure․ By mastering emotional resilience, you can navigate even the most daunting outdoor survival situations with composure․ Ultimately, fear is a natural response; your ability to manage it determines your success․ Prepare mentally by rehearsing scenarios, visualizing outcomes, and reinforcing a positive mindset․ Embrace the situation as an opportunity to strengthen your emotional fortitude and adaptability․ Remember, survival is as much about mindset as it is about skills․ Train your brain to stay calm, think clearly, and act decisively․

4․2 Developing a Positive Mental Attitude

A positive mental attitude is vital for surviving challenging outdoor situations․ cultivate optimism by focusing on solutions rather than obstacles․ Train yourself to reframe negative thoughts into proactive ones․ Practice visualization techniques to mentally prepare for potential scenarios․ Embrace challenges as opportunities to grow and thrive․ Surround yourself with uplifting stories of others’ survival successes․ Develop a mindset that seeks to problem-solve creatively․ Even in dire circumstances, maintain hope and believe in your ability to overcome․ Stay calm, remain positive, and view every obstacle as a step toward resilience․ Your mental state can determine your ability to endure and emerge stronger from any situation․

4․3 Staying Calm Under Pressure

Remaining calm is critical when faced with high-pressure survival situations․ Take slow, deep breaths to manage your stress response․ Focus on one task at a time, breaking problems into smaller, manageable steps․ Avoid panicking by staying present and assessing the situation objectively․ A clear mind allows you to make logical decisions and adapt to challenges effectively․ Practice mindfulness and visualization techniques to build emotional resilience․ Remember, staying calm prevents errors and ensures you can think clearly under duress․ This mental fortitude is essential for overcoming obstacles and ensuring your survival in difficult outdoor conditions․

4․4 Building Resilience and Adaptability

Resilience and adaptability are vital for surviving outdoor adventures․ Practice facing challenges with a growth mindset, turning obstacles into opportunities to learn and improve․ Develop problem-solving skills to address unexpected situations calmly and efficiently․ Prepare for the unknown by simulating realistic scenarios and testing your skills in diverse environments․ Embrace change and remain open to new strategies for overcoming difficulties․ Resilience fosters the ability to recover from setbacks and adapt to ever-changing conditions, ensuring your survival and success in the wild․ With practice, you can cultivate mental toughness and become a more capable and resourceful survivor․

Advanced Survival Techniques

Bushcraft skills emphasize self-reliance in the wild, including making tools and natural remedies․ Trapping and foraging for food require knowledge of local ecosystems and sustainable practices․ Signaling for help involves creative use of resources and maximizing visibility․ Mastering these techniques ensures you can adapt to extreme environments and survive longer-term challenges in the wilderness․

5․1 Bushcraft Skills

Bushcraft skills are essential for thriving in wilderness environments․ Mastering knife-making from natural materials allows you to craft tools for cutting, carving, and building․ Constructing shelter from branches and leaves ensures protection from the elements․ Learning to create cordage from plant fibers enables you to tie secure knots and build structures․ Bushcraft also involves identifying edible plants and crafting natural remedies․ Knowing how to purify water using filtration or heat ensures a safe supply․ These techniques allow you to adapt to diverse ecosystems and work with available resources․ Practicing bushcraft builds resilience and self-reliance in remote, challenging settings․

5․2 Trapping and Foraging

Trapping and foraging are vital skills for outdoor survival․ Constructing simple yet effective traps from natural materials allows you to catch small game or fish, ensuring a sustainable food supply․ Learning to identify edible plants and mushrooms is essential for foraging safely, as many wild species can be poisonous․ Never forage without proper knowledge or local guides․ Foraging for wild berries, nuts, and herbs provides natural remedies and nutrients․ Always respect local wildlife regulations to avoid harm to ecosystems or legal consequences․ Improvising tools from the environment enables successful trapping and foraging in remote areas, while preparing gathered food ensures safety and sustenance․ These skills promote resilience and self-reliance in the wilderness, making them a cornerstone of advanced survival techniques․

5․3 Signaling for Help

Signaling for help is a critical skill when stranded in the wilderness․ Use a mirror or reflective object to flash light toward rescue planes or helicopters․ Create large, visible ground signals using rocks, logs, or branches_spell out your message or distress signals like SOS․ Build smoky fires during the day or add green vegetation to create thick, visible smoke․ At night, use a flashlight or flare to send distress signals․ Stay elevated in open areas to increase visibility․ Utilize noise-making devices like whistles or banging objects to attract attention․ Always prioritize safe and sustainable signaling methods to conserve resources and avoid unintended risks․ These techniques enhance your chances of being located and rescued efficiently․

5․4 Surviving in Extreme Environments

Surviving in extreme environments requires adaptability and preparedness․ Packing a survival kit tailored to harsh conditions is essential․ In extreme cold, layer clothing, use hand warmers, and build insulated shelters․ In arid deserts, conserve water, avoid daytime heat, and navigate using natural landmarks․ At high altitudes, acclimate slowly, stay hydrated, and avoid overexertion to prevent altitude sickness․ Always prioritize shelter construction to protect from elements like wind or snow․ Use signaling tools to enhance visibility for rescue․ Test your bushcraft skills in realistic scenarios to ensure readiness․ Staying calm and resourceful in extreme conditions increases your chances of survival․ These techniques help you navigate and endure even the most challenging environments effectively․

Outdoor Safety and Risk Management

Avoiding hazards like unstable terrain and wildlife is crucial․ Preventing hypothermia by layering clothes and staying dry is essential․ Navigating dangerous areas with caution protects against accidents․ Staying calm and prepared helps manage risks and ensures safety in the outdoors․

6․1 Avoiding Common Outdoor Dangers

Avoiding common outdoor dangers begins with recognizing potential hazards like poisonous plants, venomous animals, and unstable terrain․ Stay alert to your surroundings and avoid risky paths or areas with visible dangers․ Keep a safe distance from wildlife to prevent unexpected encounters․ Always check for signs of hazards, such as sharp rocks, steep drops, or areas prone to landslides․ Pro tip: Carry a map and compass or GPS device to navigate safely․ Pay attention to weather changes, as sudden storms or temperature shifts can create unexpected risks․ Pack essential safety gear, including a headlamp, sturdy footwear, and a first-aid kit, to stay prepared․ By being cautious and avoiding complacency, you can minimize risks and ensure a safer outdoor experience․

6․2 Preventing and Treating Hypothermia

Hypothermia occurs when the body loses heat faster than it can produce it, often due to cold, wet conditions․ Prevent it by dressing in layers, using moisture-wicking fabrics, and staying dry․ Avoid overexertion that leads to sweating․ On preventing hypothermia, always carry emergency gear like hand warmers and space blankets․ If signs of hypothermia appear, such as uncontrollable shivering or confusion, act immediately; Move the person to shelter, remove wet clothing, and provide warm drinks or food․ Use a heat source or body-to-body contact to slowly rewarm the person․ Avoid placing them in hot water or exposing them to extreme temperatures, which can shock the system․ Featured tip: Always pack an emergency blanket and high-energy snacks to stay warm and fueled in cold environments․

6․3 Surviving Animal Encounters

Encounters with wildlife can be dangerous, but proper preparation and awareness can reduce risks․ Avoid attracting animals by securing food and avoiding strong odors․ Stay calm and do not run if approached; maintain a respectful distance․ Face the animal and back away slowly․ Carry deterrent tools, such as bear spray or a walking stick, and make noise to alert animals to your presence․ Avoid sudden movements that may trigger a defensive response․ If attacked, fight back using rocks, sticks, or anything at hand․ Consider the environment and barriers that can provide protection․ Featured tip: Research local wildlife and their behaviors to prepare for potential encounters․ Always prioritize safety and avoid confrontations․

6․4 Navigating Dangerous Terrain

Navigating dangerous terrain requires careful preparation and awareness of potential hazards․ Before heading out, research the route and identify challenges like steep slopes, loose rocks, or unstable ground․ Wear sturdy, supportive footwear and pack reflective gear for visibility․ Use a map and compass or GPS to stay on course and avoid getting lost․ If crossing rivers, test the water’s depth and current; never wade into areas where the water is too deep or fast-moving․ Stay alert for signs of natural hazards, such as landslide zones or collapsing cliffs․ Avoid hiking at night in unfamiliar terrain to reduce the risk of accidents․ Always notify someone of your plans and carry a first-aid kit․ Featured tip: Practice balance and stability techniques to prevent falls on uneven ground․ Navigating dangerous terrain demands focus, caution, and respect for nature’s power․


myotomes chart pdf

Category : PDF

Myotome charts, often available as PDF downloads, are essential tools for neurological assessments. They visually map muscle groups to specific spinal nerve roots, aiding in pinpointing neurological deficits.

Understanding myotomes – groups of muscles innervated by a single nerve root – is crucial for clinicians. These charts facilitate efficient myotome testing during physical examinations, guiding diagnostic processes.

The availability of downloadable myotome charts streamlines clinical workflows, providing a quick reference for both experienced practitioners and students learning neurological examination techniques.

What are Myotomes?

Myotomes represent the collection of muscles primarily innervated by a single spinal nerve root. The term itself originates from Greek roots – “myo” referring to muscle and “tome” signifying a cut or segment. Essentially, a myotome defines a specific area of muscle function linked to a particular nerve root in the spinal cord.

Clinically, understanding myotomes is vital because weakness or dysfunction in a specific muscle group can indicate a problem with the corresponding nerve root. Myotome charts, frequently found as PDF resources, visually depict these muscle-nerve root relationships. These charts are invaluable tools for neurologists, physical therapists, and other healthcare professionals.

Testing myotomes involves assessing the strength of individual muscles or muscle groups. This assessment helps identify the level of nerve root involvement, aiding in the diagnosis of conditions like radiculopathy, spinal cord injuries, or peripheral nerve damage. Accurate myotome identification, supported by readily available PDF charts, is fundamental to effective neurological evaluation.

The Importance of Myotome Testing

Myotome testing is a cornerstone of the neurological examination, providing crucial information about the integrity of the spinal cord and peripheral nerves. It helps localize lesions affecting the nervous system, differentiating between nerve root, peripheral nerve, muscle, or neuromuscular junction problems.

Utilizing myotome charts – often accessible as convenient PDF downloads – allows clinicians to systematically assess muscle strength related to specific spinal nerve roots. This systematic approach ensures a comprehensive evaluation and minimizes the risk of overlooking subtle deficits.

Accurate myotome assessment guides diagnosis and treatment planning. Identifying affected myotomes helps pinpoint the source of pain, weakness, or numbness, informing decisions about imaging, electrodiagnostic studies, or therapeutic interventions. Readily available PDF charts enhance efficiency and accuracy in clinical practice, supporting informed patient care.

Understanding the Correlation Between Nerve Roots and Muscles

A fundamental principle in neurology is the predictable relationship between spinal nerve roots and the muscles they innervate. This correlation is visually represented in myotome charts, frequently found as downloadable PDF resources.

Each spinal nerve root contributes motor fibers to specific muscle groups, forming a distinct myotome. Understanding this mapping is vital for interpreting weakness or paralysis; for example, weakness in specific muscles suggests a problem with the corresponding nerve root.

Myotome charts, available in PDF format, serve as essential references for clinicians. They facilitate accurate localization of neurological lesions, aiding in differential diagnosis. Recognizing these correlations allows for targeted investigations and effective treatment strategies, improving patient outcomes.

Components of a Myotome Chart

Myotome charts, often in PDF format, detail muscle groups, spinal nerve root innervation, and grading scales for strength assessment, offering a comprehensive overview.

Muscle Groups and Corresponding Spinal Nerve Roots

Myotome charts, frequently accessed as PDF documents, meticulously illustrate the relationship between specific muscle groups and their innervating spinal nerve roots. For example, C5 typically controls the deltoid and biceps brachii, while C6 governs wrist extensors.

Charts delineate how muscles responsible for shoulder abduction (C5), elbow flexion (C5-C6), and hand grip (C8-T1) are linked to particular nerve roots. A detailed PDF will often categorize muscles by spinal level – cervical, thoracic, lumbar, and sacral – providing a clear visual map.

Understanding these correlations is vital; weakness in a specific muscle group suggests potential issues with the corresponding nerve root. These PDF resources are invaluable for clinicians needing a quick, reliable reference during neurological examinations, aiding in accurate diagnosis and treatment planning.

Grading Systems for Myotome Strength

Myotome charts, often available as PDF downloads, incorporate standardized muscle strength grading scales. The most common is the Medical Research Council (MRC) scale, ranging from 0 (no contraction) to 5 (normal strength).

A PDF chart will typically include descriptions for each grade: 1 (flicker of contraction), 2 (movement with gravity eliminated), 3 (movement against gravity), and 4 (good strength, some fatigue). Accurate grading requires careful observation during myotome testing.

Consistent application of these grading systems, as outlined in PDF resources, ensures objective documentation of neurological function. This standardized approach facilitates tracking changes over time and communicating findings effectively among healthcare professionals, improving patient care and diagnostic accuracy.

Visual Representation of Myotomes

Myotome charts, frequently found as PDF downloads, employ color-coding and anatomical illustrations to visually represent muscle groups and their corresponding spinal nerve root innervation. These charts depict the body, highlighting muscles associated with specific myotomes.

A well-designed PDF chart simplifies complex neurological mapping, allowing clinicians to quickly identify muscles to test for specific nerve root involvement. Different charts may vary in detail, some focusing on the entire body, while others concentrate on upper or lower extremities.

The visual nature of these PDF resources aids in understanding the relationship between nerve roots and muscle function, enhancing both diagnostic accuracy and educational value for students learning neurological assessments.

Types of Myotome Charts

Myotome charts, often in PDF format, vary by focus: standard full-body views, pediatric-specific charts, and those isolating upper or lower extremities for detailed assessment.

Standard Myotome Charts

Standard myotome charts, frequently found as readily available PDF downloads, present a comprehensive overview of muscle groups and their corresponding spinal nerve root innervation throughout the entire body. These charts typically illustrate both the anterior and posterior views, offering a complete visual representation for clinicians.

These widely utilized charts are invaluable for initial neurological screenings, allowing for a broad assessment of potential nerve root involvement. The PDF format ensures easy accessibility and portability, enabling quick reference during patient examinations. They commonly depict key myotomes for both upper and lower extremities, as well as trunk muscles.

Many PDF versions also include accompanying dermatome maps, providing a holistic view of sensory and motor distributions. Clinicians can efficiently utilize these charts to identify patterns of weakness suggestive of specific spinal cord or nerve root pathologies. The clarity and organization of these standard charts make them a cornerstone of neurological assessment.

Pediatric Myotome Charts

Pediatric myotome charts, often available as PDF downloads, are specifically designed to account for the developmental differences in muscle innervation observed in children. Unlike adult charts, these versions recognize that myotome mapping can evolve as a child grows, requiring age-appropriate assessment tools.

These charts frequently feature simplified illustrations and focus on key muscle groups commonly assessed in pediatric neurological examinations. The PDF format allows for easy printing and annotation during evaluations. They are crucial for identifying developmental delays or neurological conditions affecting motor function in young patients.

Clinicians utilizing these charts must consider variations in muscle development and innervation patterns. Many PDF resources include guidelines for age-related expectations, aiding in accurate interpretation of findings. These specialized charts are essential for comprehensive neurological assessment in the pediatric population.

Lower Extremity Myotome Charts

Lower extremity myotome charts, readily accessible as PDF downloads, concentrate on the muscles of the hip, knee, ankle, and foot. These charts are vital for assessing nerve root function related to lower limb movement and strength, aiding in the diagnosis of conditions like sciatica or lumbar radiculopathy.

A typical PDF chart will visually depict muscle groups – hip flexors, extensors, abductors, adductors, knee flexors and extensors, ankle dorsiflexors, plantarflexors, and foot invertors/evertors – alongside their corresponding spinal nerve root innervation (L2-S1). This allows for targeted testing during a neurological exam.

Clinicians use these charts to systematically evaluate muscle strength and identify patterns of weakness indicative of specific nerve root compression or damage. Downloadable PDF versions offer portability and ease of use in clinical settings, supporting accurate and efficient patient assessment.

Upper Extremity Myotome Charts

Upper extremity myotome charts, frequently found as convenient PDF downloads, focus on the muscles of the shoulder, arm, forearm, and hand. These charts are indispensable for evaluating nerve root function impacting upper limb movement and strength, assisting in diagnosing conditions like cervical radiculopathy or brachial plexus injuries.

A standard PDF chart illustrates muscle groups – shoulder abduction, flexion, extension, elbow flexion and extension, wrist flexion/extension, finger abduction/adduction, and grip strength – correlated with their respective spinal nerve root innervation (C5-T1). This enables focused testing during neurological examinations.

Clinicians utilize these charts to methodically assess muscle strength and pinpoint weakness patterns suggesting specific nerve root compromise; Downloadable PDF formats provide portability and ease of access in clinical environments, promoting precise and efficient patient evaluations.

Using a Myotome Chart in Clinical Practice

PDF myotome charts are vital for systematic neurological exams, guiding muscle testing and documentation. They ensure accurate assessment of nerve root function during patient evaluations.

Performing a Myotome Examination

Utilizing a myotome chart PDF during examination is paramount for a structured assessment. Begin by explaining the procedure to the patient, ensuring their comfort and cooperation. Systematically test each muscle group corresponding to specific spinal nerve roots, referencing the chart for accurate identification.

Observe for muscle contractions and record the strength using a standardized grading system (0-5), noting any weakness or asymmetry. Resistance should be applied appropriately, avoiding patient discomfort. A PDF chart allows for quick cross-referencing during the exam, ensuring no myotome is overlooked.

Pay attention to the patient’s response and any reported pain or fatigue. Document observations meticulously, including the grade achieved for each muscle group and any relevant clinical findings. Consistent application of the myotome chart enhances the reliability and validity of the neurological assessment.

Documenting Myotome Findings

Accurate documentation of myotome examination results is crucial for effective patient care. When utilizing a myotome chart PDF, record each muscle group’s strength grade (0-5) clearly and concisely within the patient’s medical record. Include laterality – noting any differences between the left and right sides.

Beyond numerical grades, document qualitative observations, such as fatigue, pain with movement, or inconsistent effort. Referencing the specific PDF chart used during the assessment ensures clarity and reproducibility. Detailed notes are essential for tracking changes over time and informing treatment decisions.

A well-documented myotome exam, guided by a PDF resource, provides a baseline for monitoring neurological function and evaluating the effectiveness of interventions. This comprehensive record supports accurate diagnosis and facilitates communication among healthcare professionals.

Interpreting Myotome Results

Interpreting myotome testing, aided by a myotome chart PDF, requires correlating weakness patterns with specific spinal nerve root levels. Isolated weakness in a particular myotome suggests potential compression or damage to the corresponding nerve root. Consider the distribution of weakness – is it localized or does it follow a dermatomal pattern?

Using the PDF chart as a reference, identify consistent patterns of weakness that may indicate broader neurological issues. Remember that compensation patterns can mask true deficits; careful observation is key. Compare findings to reflex testing and sensory examination results for a comprehensive assessment.

A myotome chart PDF facilitates accurate interpretation, but clinical judgment remains paramount. Consider the patient’s history, other neurological signs, and imaging findings to arrive at a definitive diagnosis.

Myotome Charts and Related Neurological Assessments

Myotome charts, often found as PDF resources, complement dermatome mapping and reflex testing for a complete neurological evaluation, aiding accurate diagnoses.

Myotomes vs. Dermatomes

Myotomes and dermatomes are fundamental concepts in neurological examination, often visualized together on comprehensive charts, frequently available as PDF downloads. While myotomes map to muscle groups innervated by specific spinal nerve roots – assessing motor function – dermatomes delineate areas of skin supplied by sensory fibers from those same roots, evaluating sensory function.

Essentially, myotome charts focus on movement, identifying weakness indicative of nerve root compression or damage. Conversely, dermatome charts highlight sensation, revealing altered or absent feeling. Clinicians utilize both assessments in tandem; a PDF chart combining both provides a holistic view.

Discrepancies between myotome and dermatome findings can suggest complex neurological issues, guiding further investigation. For example, weakness without sensory loss might indicate anterior horn cell involvement, while sensory loss without weakness could point to a sensory nerve issue. Therefore, understanding the interplay between these two concepts, aided by readily accessible myotome chart PDF resources, is vital for accurate neurological diagnosis.

Myotomes and Reflex Testing

Myotome assessment and reflex testing are intrinsically linked components of a thorough neurological examination, often conveniently presented together in a PDF chart format. Reflexes, such as the biceps or patellar reflex, are elicited by stimulating specific nerve roots, and their strength correlates directly with the function of the corresponding myotome.

Diminished or absent reflexes often suggest weakness in the associated muscles, as indicated by myotome testing. Conversely, hyperreflexia (exaggerated reflexes) can signify upper motor neuron lesions. A comprehensive myotome chart PDF will often include a corresponding reflex map for quick reference.

Therefore, evaluating reflexes alongside myotome strength provides a more complete picture of nerve root integrity. Utilizing a combined PDF resource allows clinicians to efficiently correlate motor function (myotomes) with neurological reactivity (reflexes), enhancing diagnostic accuracy and informing treatment strategies.

Myotomes in the ASIA Impairment Scale

The American Spinal Injury Association (ASIA) Impairment Scale relies heavily on myotome testing to objectively assess the neurological function of individuals with spinal cord injuries. A detailed myotome chart PDF is indispensable for standardized evaluation using this scale.

The ASIA scale grades motor function in key myotomes within specific muscle groups, assigning scores from 0 (no detectable contraction) to 5 (normal strength). These scores, documented using a PDF chart, determine the ASIA Impairment Scale classification, guiding prognosis and rehabilitation planning.

Clinicians utilize myotome charts to ensure consistent and reproducible testing across different examiners and settings. Downloadable PDF versions of these charts, often including ASIA scoring guidelines, facilitate accurate and reliable assessment of neurological deficits post-spinal cord injury.

Resources for Myotome Charts (PDF Downloads)

Numerous websites offer myotome chart PDF downloads, ranging from free, basic versions to more comprehensive, paid resources for detailed clinical assessments.

Reliable sources include medical education sites and professional organizations, providing accurate and readily accessible myotome references for practitioners.

Reliable Sources for Printable Charts

Finding trustworthy myotome chart PDF resources is paramount for accurate clinical application. Several organizations and websites consistently provide high-quality, printable charts suitable for medical professionals and students. The American Spinal Injury Association (ASIA) offers resources, including diagrams illustrating key myotomes and dermatomes, often available through their publications or affiliated institutions.

Medical textbooks frequently include appendices with printable myotome charts, ensuring alignment with established medical knowledge. University medical center websites often host educational materials, including downloadable charts for learning and reference. Furthermore, reputable physiotherapy and rehabilitation websites often curate lists of reliable myotome chart PDF downloads.

When selecting a chart, prioritize sources with clear anatomical illustrations and accurate nerve root correlations. Always verify the chart’s origin and ensure it aligns with current medical standards to maintain the integrity of your neurological assessments.

Free vs. Paid Myotome Charts

The availability of myotome chart PDFs spans a spectrum from free resources to commercially available options. Free charts, often found on university websites or medical education platforms, provide a basic overview suitable for students or quick reference. However, these may lack the detail or clarity found in paid versions.

Paid charts, typically offered by medical supply companies or specialized publishers, often feature higher-resolution images, more comprehensive myotome coverage, and additional clinical information like grading scales and associated reflexes. Some paid charts are interactive PDFs, allowing for digital annotation.

The choice depends on individual needs and budget; For basic learning or infrequent use, free charts suffice. However, for consistent clinical practice and detailed assessment, investing in a high-quality, paid myotome chart PDF is often worthwhile;

Considerations When Choosing a Chart

Selecting the appropriate myotome chart PDF requires careful consideration. Clarity is paramount; the chart should clearly delineate muscle groups and their corresponding spinal nerve roots, avoiding visual clutter. Ensure the chart’s anatomical illustrations are accurate and easy to interpret, especially for less familiar muscle groups.

Consider the chart’s scope – does it cover upper and lower extremities, or is it focused on a specific region? The inclusion of muscle grading scales (0-5) is beneficial for standardized assessment. A well-organized chart facilitates efficient documentation of findings during neurological exams.

Finally, assess the PDF’s print quality and usability. A high-resolution file ensures legibility when printed, and a logically structured layout enhances clinical workflow. Prioritize charts from reputable sources to guarantee accuracy and reliability.

Advanced Concepts in Myotome Analysis

Myotome chart PDFs aid in recognizing compensation patterns and variations, crucial for diagnosing complex neurological conditions beyond simple nerve root identification.

Variations in Myotome Distribution

Myotome chart PDFs often present a standardized view, but anatomical variations are common. Individuals exhibit differences in muscle innervation patterns, meaning a muscle typically associated with one nerve root might receive contributions from adjacent roots.

These variations can lead to atypical weakness patterns not fully explained by a standard myotome assessment. Clinicians utilizing myotome charts must remain aware of this possibility, especially when findings don’t align perfectly with expected distributions.

Detailed PDF resources sometimes highlight these common variations, offering a more nuanced understanding. Recognizing these discrepancies is vital for accurate diagnosis and avoiding misinterpretation of neurological deficits. Thorough patient evaluation, beyond simply referencing a myotome chart, is paramount.

Furthermore, congenital variations or prior surgical interventions can alter myotome distributions, necessitating a flexible approach to neurological assessment and interpretation.

Compensation Patterns in Weakness

When a specific myotome is weakened, as identified using a myotome chart PDF, the body often employs compensatory mechanisms. Adjacent muscles, innervated by different nerve roots, may work harder to maintain functional movement.

These compensation patterns can mask the true extent of the weakness in the affected myotome, potentially leading to an underestimation of the neurological deficit during initial examination. A detailed myotome assessment, guided by a PDF chart, must account for these secondary effects.

Clinicians should observe for subtle signs of overactivity in surrounding muscle groups. Recognizing these patterns requires careful observation and a thorough understanding of biomechanics. PDF resources often illustrate common compensation strategies.

Ultimately, identifying compensation allows for a more accurate interpretation of myotome testing results and a more targeted rehabilitation plan.

The Role of Myotomes in Diagnosing Neurological Conditions

Myotome charts, readily available as PDF downloads, are invaluable in diagnosing a wide range of neurological conditions. Patterns of weakness across specific myotomes can indicate the level of spinal cord involvement, nerve root compression, or peripheral nerve damage.

For example, weakness in a specific myotome, identified using a PDF chart, might suggest a herniated disc or spinal stenosis. Comparing myotome testing results with dermatomal and reflex findings strengthens diagnostic accuracy.

Conditions like polio, amyotrophic lateral sclerosis (ALS), and Guillain-Barré syndrome all present with characteristic myotome weakness patterns. A PDF resource provides a visual guide for recognizing these patterns.

Accurate myotome assessment, facilitated by a clear chart, is crucial for timely diagnosis and appropriate treatment planning, ultimately improving patient outcomes.


code de la route québec pdf

Category : Canada

The Code de la Route Québec PDF is a vital resource for understanding traffic laws and safe driving practices in Québec. Published by the SAAQ, it outlines rules, signs, and driver responsibilities, ensuring compliance with road safety standards for all users.

Overview of the Québec Road Safety Code

The Québec Road Safety Code, also known as the Code de la Route, is a comprehensive guide outlining traffic laws, regulations, and safe driving practices in Québec. Published by the Société de l’assurance automobile du Québec (SAAQ), it serves as the primary reference for all road users, including drivers, pedestrians, and cyclists. The code is structured to ensure road safety and compliance with legal standards, covering topics such as traffic signs, driver responsibilities, and specific rules for motorcycles and heavy vehicles. It is regularly updated to reflect new laws and safety measures, making it an essential resource for both residents and foreign drivers in Québec.

The guide is available in both digital and print formats, providing easy access to critical information. It emphasizes the importance of understanding and adhering to traffic rules to reduce accidents and promote a safe driving environment. By following the code, road users can contribute to a safer and more orderly transportation system in Québec.

Importance of the Code de la Route in Québec

The Code de la Route is a fundamental legal framework ensuring road safety and order in Québec. It provides clear guidelines for all road users, including drivers, pedestrians, and cyclists, to minimize accidents and promote responsible behavior. By adhering to the code, individuals contribute to a safer environment and avoid legal penalties. The document is regularly updated to reflect new safety measures and laws, making it indispensable for both new and experienced drivers. Its availability in digital and print formats ensures accessibility for everyone. Understanding and following the code is essential for obtaining a driver’s license and maintaining compliance with Québec’s traffic regulations. It serves as a key resource for learning and adhering to the rules of the road.

Structure and Content of the PDF Document

The Code de la Route Québec PDF is organized into clear chapters, covering essential topics such as rules of the road, traffic signs, and driver responsibilities. It includes detailed sections on safe driving practices, regulations for pedestrians and cyclists, and specific rules for motorcycles and heavy vehicles. The document also provides visual aids like diagrams and images to help users understand complex traffic scenarios. Available in both print and digital formats, the PDF is easily accessible and regularly updated to reflect changes in traffic laws. Its structured layout ensures that readers can quickly find relevant information, making it an invaluable resource for learning and adhering to Québec’s road safety standards. This comprehensive guide is designed to promote safe and responsible driving practices across the province.

Obtaining the Code de la Route PDF

The Code de la Route Québec PDF can be downloaded from the official SAAQ website or obtained in print from local SAAQ offices, ensuring easy access for all drivers.

Downloading from the SAAQ Website

Downloading the Code de la Route Québec PDF from the SAAQ website is straightforward and convenient. Visit the official SAAQ website at saaq.gouv.qc.ca and navigate to the section dedicated to road safety and driver resources. The PDF is available for free download, ensuring everyone can access essential traffic laws, rules, and safety guidelines. The document is regularly updated to reflect the latest changes in road safety regulations. By downloading the PDF, users can study the rules of the road, traffic signs, and driver responsibilities at their own pace. This resource is particularly useful for new drivers preparing for their theory exam or for anyone looking to refresh their knowledge of Québec’s traffic laws.

Availability in Print and Digital Formats

The Code de la Route Québec is available in both print and digital formats, ensuring accessibility for all users. The digital version can be downloaded as a PDF from the official SAAQ website, free of charge. This format is ideal for those who prefer electronic access, allowing easy navigation and search functionality. Additionally, a print version can be purchased through the SAAQ’s online store or obtained in person at local SAAQ service centers. This dual availability caters to different preferences, whether users prefer a physical copy for reference or a digital version for convenience. Both formats contain the same comprehensive information, ensuring everyone can stay informed about Québec’s traffic laws and road safety guidelines.

Accessing the PDF Through Official Channels

To ensure authenticity and accuracy, the Code de la Route Québec PDF should be accessed through official channels. The most reliable source is the SAAQ’s official website, where the document is available for free download. Users can visit the SAAQ portal, navigate to the publications section, and directly access the PDF guide. Additionally, the SAAQ service centers provide physical copies or assistance with digital downloads. It is crucial to avoid unofficial sources, as they may contain outdated or incorrect information. By obtaining the PDF through official channels, drivers and road users can rely on the most current and accurate version of the Code de la Route, ensuring compliance with Québec’s traffic laws and safety standards.

Key Sections of the Code de la Route

The Code de la Route Québec PDF covers essential sections including rules for drivers, pedestrians, cyclists, and heavy vehicles, along with traffic signs, driver responsibilities, and safety tips.

Rules of the Road for Drivers

The Code de la Route Québec PDF provides detailed rules for drivers, including speed limits, right-of-way regulations, and prohibited maneuvers. It emphasizes safe driving practices, such as maintaining a safe distance, using signals, and adhering to traffic signs. Drivers are also required to respect specific laws regarding alcohol consumption, seatbelt use, and the use of electronic devices while driving. Understanding these rules is essential for ensuring road safety and avoiding penalties. The guide also covers special situations, such as driving in school zones or construction areas, and provides clear instructions for handling emergencies. By following these rules, drivers contribute to a safer and more orderly road environment in Québec.

Regulations for Pedestrians and Cyclists

The Code de la Route Québec PDF outlines specific regulations for pedestrians and cyclists to ensure their safety on Québec roads. Pedestrians must use crosswalks and follow traffic signals, while cyclists are required to ride in designated bike lanes and adhere to traffic rules. Both groups have the right-of-way in certain situations, such as pedestrians in crosswalks and cyclists when lanes are shared. The code emphasizes the importance of visibility and responsible behavior, such as cyclists using hand signals and pedestrians staying alert. These regulations aim to promote harmony and safety among all road users, ensuring that pedestrians and cyclists can navigate Québec’s roads confidently and securely.

Specific Rules for Motorcycles and Heavy Vehicles

The Code de la Route Québec PDF includes specific regulations for motorcycles and heavy vehicles to ensure road safety. Motorcyclists must wear helmets and follow lane-sharing rules, while heavy vehicle drivers must adhere to weight limits and specific driving hours. The code outlines mandatory safety equipment for both categories, such as reflective gear for motorcycles and braking systems for heavy vehicles. Additionally, heavy vehicles are restricted from certain lanes and roads during peak hours. These rules aim to reduce accidents and ensure smooth traffic flow, while also protecting other road users from potential risks associated with larger and faster vehicles. Compliance is essential to maintain safety and avoid penalties.

Traffic Signs and Signals

The Code de la Route Québec PDF details traffic signs and signals, ensuring drivers recognize and obey them for safety and order on the road.

Understanding Traffic Signs in Québec

Understanding traffic signs in Québec is essential for safe driving. The Code de la Route Québec PDF categorizes signs into warning, regulatory, and informational types. Warning signs alert drivers to potential hazards, while regulatory signs enforce traffic laws, such as speed limits and right-of-way rules. Informational signs provide guidance, like directions or road conditions. Recognizing these signs ensures compliance with traffic laws and enhances road safety. The PDF guide details each sign’s meaning and importance, helping drivers navigate Québec’s roads confidently. Familiarizing oneself with these signs is crucial for all road users, including drivers, pedestrians, and cyclists, to promote a safe and orderly traffic environment.

Importance of Recognizing Traffic Signals

Recognizing traffic signals is crucial for maintaining road safety and order in Québec. Traffic signals, including lights, arrows, and pedestrian signals, guide drivers and road users to prevent accidents and ensure smooth traffic flow. The Code de la Route Québec PDF emphasizes the importance of understanding these signals, as they dictate when to stop, go, or yield. Failure to recognize or obey traffic signals can lead to serious consequences, including accidents and legal penalties. By familiarizing oneself with these signals, drivers can navigate Québec’s roads confidently and responsibly, contributing to a safer environment for all users. This knowledge is essential for both new and experienced drivers to adhere to traffic laws and promote road safety.

Common Traffic Signs and Their Meanings

The Code de la Route Québec PDF details various traffic signs that guide drivers, pedestrians, and cyclists. These signs are categorized into warning, regulatory, and informational types. Warning signs, such as curves or pedestrian crossings, alert drivers to potential hazards. Regulatory signs, like speed limits or stop signs, enforce specific rules. Informational signs provide directions or indicate services. Understanding these signs is essential for safe navigation and legal compliance. For example, a red octagon signifies a stop, while a yellow diamond with a pedestrian indicates caution. Familiarizing oneself with these symbols ensures adherence to traffic laws and enhances road safety for all users. Recognizing these signs is a fundamental skill for every road user in Québec.

Driver’s Responsibilities and Rights

Drivers in Québec must adhere to legal obligations, ensuring safe practices and respecting traffic laws. Understanding rights and duties is crucial for responsible and lawful driving habits.

Legal Obligations of Drivers in Québec

Drivers in Québec must hold a valid driver’s license, adhere to traffic laws, and ensure their vehicle meets safety standards. They are required to wear seatbelts, follow speed limits, and yield to pedestrians. Obligations include stopping at stop signs and red lights, using signals, and maintaining a safe distance from other vehicles. Drivers must also report accidents and provide assistance if needed. Additionally, they are prohibited from driving under the influence of alcohol or drugs. Compliance with these legal duties ensures road safety and avoids penalties. Understanding these obligations is essential for all drivers to contribute to a safe and orderly traffic environment in Québec.

Understanding Driver’s Rights and Duties

Drivers in Québec have both rights and duties under the Code de la Route. Rights include the freedom to drive on public roads and protection under traffic laws; Duties involve obeying all traffic signs, signals, and regulations to ensure safety. Drivers must carry a valid license, maintain vehicle insurance, and report accidents. They are also required to respect pedestrian and cyclist rights. Understanding these responsibilities helps drivers navigate roads confidently while contributing to a safe environment. The SAAQ provides detailed guidelines to clarify these obligations, ensuring compliance and promoting responsible driving practices across the province.

Consequences of Violating Traffic Laws

Violating the Code de la Route in Québec can lead to serious consequences, including fines, demerit points, and even license suspension. Drivers who accumulate too many demerit points may face penalties such as increased insurance rates or mandatory driving courses. Severe offenses, like reckless driving or impaired driving, can result in criminal charges, hefty fines, and loss of driving privileges. Additionally, violating traffic laws may lead to civil liability in the event of an accident, resulting in financial and legal repercussions. It is crucial for drivers to adhere to traffic laws to avoid these consequences and ensure road safety for all users. The SAAQ enforces these regulations to maintain order and protect the public.

Road Safety Tips and Best Practices

Adhering to the Code de la Route ensures safer roads. Maintain safe distances, use signals, and respect speed limits. Be vigilant and courteous to all road users, including pedestrians and cyclists; Always wear seatbelts and avoid distractions while driving. Regular vehicle maintenance and awareness of weather conditions are also crucial for safe driving practices in Québec.

Safe Driving Practices in Québec

The Code de la Route Québec PDF emphasizes safe driving practices to reduce accidents and enhance road safety. Drivers must maintain safe distances, use turn signals consistently, and adhere to speed limits. Wearing seatbelts is mandatory for all passengers, and distractions like using mobile phones while driving are strictly prohibited. Additionally, staying alert and avoiding aggressive behaviors are crucial. Pedestrians and cyclists must also follow specific rules to ensure mutual safety. Weather conditions, such as snow or rain, require extra caution and reduced speeds. By following these guidelines, drivers can contribute to a safer and more orderly road environment in Québec.

Sharing the Road with Other Users

Sharing the road safely with other users is a cornerstone of the Code de la Route Québec PDF. Drivers must respect pedestrians, cyclists, and motorcyclists by yielding the right-of-way and maintaining safe distances. Cyclists are required to follow traffic rules and use designated bike lanes when available. Pedestrians should cross streets at designated crosswalks and be visible to drivers. Motorists must also be cautious around heavy vehicles, which have larger blind spots and require more stopping distance. Mutual respect and awareness among all road users are essential to prevent accidents and ensure smooth traffic flow. By adhering to these guidelines, everyone can contribute to a safer and more harmonious road environment in Québec.

Emergency Procedures and Safety Measures

The Code de la Route Québec PDF emphasizes the importance of being prepared for emergencies and understanding safety measures. In case of a breakdown, drivers should move to a safe location and use warning triangles or flares. Knowing first aid basics and having an emergency kit in the vehicle is crucial. The code also outlines procedures for accidents, such as securing the scene, assisting injured individuals, and reporting the incident. Additionally, it highlights the necessity of winter tires and proper vehicle maintenance to prevent accidents. Staying informed about emergency protocols ensures drivers can respond effectively, protecting themselves and others on the road. These measures are vital for maintaining road safety in Québec.

Using the Code de la Route for Study

The Code de la Route Québec PDF is an essential study tool for mastering Québec’s traffic laws and preparing for the driving theory exam. It provides detailed explanations, sample questions, and practical scenarios to help learners assess their knowledge and improve understanding of road safety rules. Regular review of the guide ensures familiarity with regulations, making it easier to pass the SAAQ written test and become a confident driver.

Preparing for the Driving Theory Exam

Preparing for the driving theory exam requires a thorough understanding of the Code de la Route Québec PDF. The SAAQ’s official guide provides detailed explanations of traffic laws, road signs, and safe driving practices. By studying the PDF, learners can familiarize themselves with the format and content of the exam. The document includes sample questions and scenarios to test knowledge and identify areas for improvement. Regular review of the guide ensures a strong foundation in road safety and regulations. Additionally, the PDF’s structured content allows learners to focus on key topics, such as rules of the road, traffic signs, and driver responsibilities, making it an essential tool for achieving success on the theory exam.

Study Tips for the SAAQ Written Test

Mastering the Code de la Route Québec PDF is essential for success on the SAAQ written test. Start by creating a study schedule to cover all sections systematically. Focus on key areas like traffic signs, rules of the road, and driver responsibilities. Use the PDF to identify and review challenging topics. Practice with sample questions provided in the guide to familiarize yourself with the exam format. Take advantage of online resources, such as practice tests on the SAAQ website, to reinforce your knowledge. Pay special attention to traffic signs and their meanings, as they are heavily tested. Regularly test yourself and track your progress to ensure readiness for the exam. Consistent study and practice will help you achieve a high score and confidently pass the written test.

Practicing with Sample Questions and Tests

Practicing with sample questions and tests is a proven way to prepare for the SAAQ written exam. The Code de la Route Québec PDF includes practice tests that simulate real exam conditions. Start by reviewing the PDF thoroughly, then attempt the sample questions without referring back to the material. This helps identify areas where you need more study. Online resources, such as practice tests on the SAAQ website, can further reinforce your knowledge. Time yourself to get used to the exam format and pressure. Focus on understanding traffic signs, rules of the road, and driver responsibilities, as these are heavily tested. Regular practice ensures familiarity with the content and boosts confidence for the actual test.

Resources for Foreign Drivers

The SAAQ website offers resources for foreign drivers, including guides on converting foreign licenses and understanding Québec traffic laws. Additional materials are available for non-residents.

Understanding Québec Traffic Laws as a Foreign Driver

Foreign drivers in Québec must familiarize themselves with the Code de la Route to ensure compliance with local traffic laws. The SAAQ provides resources, including the Guide de la route PDF, to help non-residents understand regulations. Key topics include traffic signs, speed limits, and specific rules for pedestrians, cyclists, and motorists. Converting a foreign driver’s license is also addressed, with detailed steps outlined on the SAAQ website. Understanding these laws is crucial for safe driving and avoiding penalties. Additional resources, such as practice exams and guides, are available to assist foreign drivers in adapting to Québec’s road safety standards.

Converting a Foreign Driver’s License in Québec

Foreign drivers wishing to convert their license in Québec must follow specific steps outlined by the SAAQ. The process typically requires making an appointment at a local SAAQ service center and providing necessary documents, such as a valid foreign license, proof of residency, and identity. A vision test is usually mandatory, and in some cases, a written or road test may be required. The SAAQ website provides detailed instructions and lists of required documents to facilitate the process. Understanding the requirements ensures a smooth transition to obtaining a Québec driver’s license, allowing foreign drivers to legally operate vehicles in the province.

Additional Resources for Non-Residents

Non-residents in Québec can access various resources to understand the Code de la Route. The SAAQ website offers detailed guides and downloadable PDFs, including the Guide de la route, which is available in both print and digital formats. Additionally, the SAAQ provides customer support through their website and phone services, assisting non-residents with specific inquiries. Many resources are also available in multiple languages to cater to international drivers. These materials cover essential topics such as traffic laws, road signs, and driver responsibilities. Utilizing these resources ensures that non-residents can navigate Québec’s roads safely and legally, regardless of their familiarity with local driving regulations.

Staying Updated on Changes

Regularly check the SAAQ website for updates to the Code de la Route. Subscribe to notifications for new regulations and adjustments to traffic laws in Québec.

Recent Updates to the Code de la Route

The Code de la Route is regularly updated to reflect evolving road safety priorities. Recent changes include new speed limits in urban areas, stricter penalties for distracted driving, and enhanced regulations for electric vehicles. Additionally, there are updated guidelines for sharing the road with cyclists and pedestrians, emphasizing mutual respect and safety. The SAAQ also introduced new rules for heavy vehicles, including mandatory rest periods and specific loading requirements. These updates aim to reduce accidents and improve traffic flow. Staying informed about these changes is crucial for all road users to ensure compliance and contribute to a safer driving environment in Québec.

How to Stay Informed About Changes

To stay updated on changes to the Code de la Route, visit the official SAAQ website regularly. Subscribe to their newsletter for notifications on new regulations and updates; Additionally, follow the SAAQ’s social media accounts for timely announcements. The SAAQ also provides a dedicated section on their website for recent amendments, ensuring easy access to the latest information. For further assistance, contact the SAAQ customer service at 1-800-361-7620. By staying connected through these channels, drivers can remain informed and adapt to any changes, ensuring compliance and enhancing road safety in Québec.

Impact of Updates on Driving Habits

Updates to the Code de la Route can significantly influence driving habits in Québec. New regulations often address emerging safety concerns, such as distracted driving or speeding, prompting drivers to adjust their behavior. For instance, updated traffic signs or stricter penalties for violations may lead to increased caution on the road. The SAAQ ensures these changes are well-communicated, helping drivers stay informed and compliant. Failing to adapt to these updates can result in fines or accidents, emphasizing the importance of staying informed. By understanding and adhering to the latest rules, drivers contribute to a safer and more orderly road environment for all users.

The Code de la Route Québec PDF is essential for safe and lawful driving in Québec. Regular updates ensure it remains relevant, promoting road safety and responsible behavior.

Final Thoughts on the Importance of the Code de la Route

The Code de la Route Québec PDF serves as a cornerstone for road safety and legal compliance in Québec. It provides clear guidelines for all road users, ensuring a safer and more orderly transportation system. By understanding and adhering to the rules outlined in the document, drivers, pedestrians, and cyclists can significantly reduce the risk of accidents and contribute to a shared responsibility for road safety. Regular updates to the Code reflect evolving safety standards, making it a dynamic and essential resource for everyone. Whether you’re a new or experienced driver, familiarizing yourself with the Code is crucial for protecting lives and upholding the law on Québec’s roads.

Encouragement to Follow Traffic Rules

Adhering to the Code de la Route Québec is essential for ensuring safety and order on the roads. By following traffic rules, drivers, pedestrians, and cyclists contribute to a shared responsibility for reducing accidents and enhancing mobility. The Code provides clear guidelines on traffic signs, speed limits, and right-of-way rules, which are crucial for avoiding violations and penalties. Understanding and respecting these regulations not only protects individuals but also upholds the legal framework designed to safeguard everyone. Encouraging others to follow traffic rules fosters a culture of safety and mutual respect, making Québec’s roads safer for all users. Stay informed and committed to the Code to drive responsibly and confidently.

Continuous Learning for Safe Driving

Continuous learning is key to maintaining safe driving habits in Québec. The Code de la Route Québec PDF serves as a comprehensive guide, offering updated rules and best practices. Drivers should regularly review the document to stay informed about new regulations and safety measures. The SAAQ provides additional resources, such as study guides and practice tests, to help drivers reinforce their knowledge. Staying updated ensures compliance with traffic laws and promotes a safer environment for all road users. Encourage yourself and others to revisit the Code periodically, as continuous learning fosters a culture of safety and responsibility on Québec’s roads.


wholly gluten free pie crust instructions

Category : Instructions

Discover the secret to a tender, flaky gluten-free pie crust, perfect for sweet and savory fillings․ Easy to handle and bake, it rivals traditional crusts in texture and flavor;

Overview of Gluten-Free Baking

Gluten-free baking requires careful selection of ingredients to achieve the right texture and structure․ Unlike traditional baking, it often involves blending multiple flours and additives to mimic gluten’s elasticity․ This approach ensures that baked goods, like pie crusts, remain tender and flaky without sacrificing flavor․ With the right combination of gluten-free flours and fats, bakers can create crusts that are both durable and delicious, perfect for sweet or savory fillings․ This method has become increasingly popular, offering inclusive options for all bakers․

Importance of a Good Pie Crust

A good pie crust is the foundation of a memorable pie, providing structure, texture, and flavor․ It enhances both sweet and savory fillings, creating a balanced and appealing dish․ A well-made crust ensures the filling is contained and cooked evenly, while its texture adds to the overall enjoyment․ Whether buttery, flaky, or tender, a quality crust elevates the pie experience, making it a standout in any meal or dessert․

Benefits of a Wholly Gluten-Free Pie Crust

A wholly gluten-free pie crust offers versatility for both sweet and savory pies, ensuring accessibility for gluten-sensitive individuals while maintaining a tender, flaky texture everyone will enjoy․

Health Benefits for Gluten-Sensitive Individuals

A wholly gluten-free pie crust eliminates gluten, preventing discomfort and digestive issues for those with gluten sensitivity or celiac disease․ It promotes better digestion and overall well-being, making it a safe and enjoyable option for individuals with dietary restrictions․ By using gluten-free flours, the crust ensures that everyone can savor delicious pies without compromising their health․ This option is particularly beneficial for those who need to avoid gluten entirely while still enjoying homemade treats․

Versatility for Sweet and Savory Pies

A wholly gluten-free pie crust offers unmatched versatility, catering to both sweet and savory creations․ From classic fruit pies to hearty pot pies, it adapts seamlessly to any filling․ The crust’s buttery, flaky texture complements sweet ingredients like berries or chocolate, while its neutral flavor pairs perfectly with savory fillings such as chicken or vegetables․ This adaptability makes it a reliable choice for any pie lover, ensuring delicious results every time without compromising on taste or texture․

Essential Ingredients for Gluten-Free Pie Crust

Essential ingredients for a wholly gluten-free pie crust include a mix of gluten-free flours, fats, liquids, and additives, each crucial for achieving a perfect flaky and tender texture․

Gluten-Free Flours (Rice, Oat, Millet)

A blend of rice, oat, and millet flours creates a balanced gluten-free pie crust․ Rice flour adds lightness and crispness, while oat flour contributes softness and structure․ Millet flour enhances flavor and texture, ensuring a tender, flaky crust without the need for xanthan gum․ This combination provides the perfect base for both sweet and savory pies, delivering a crust that rivals traditional wheat-based versions in taste and texture․

Fats (Butter, Dairy-Free Alternatives)

Fats are essential for a flaky, tender crust․ Butter adds richness and flavor, while dairy-free alternatives like coconut oil or vegan butter ensure inclusivity․ These fats create layers in the dough, resulting in a light, buttery texture․ For a vegan option, chilled coconut oil or plant-based butter substitutes work perfectly, maintaining the crust’s structure and flavor without dairy․ Properly incorporating fats ensures a golden, delicious crust for both sweet and savory pies․

Liquids (Water, Egg, or Vegan Substitutes)

Liquids are crucial for binding gluten-free ingredients․ Water hydrates the dough, while eggs add richness and structure․ For vegan options, flaxseed or applesauce substitutes work beautifully․ These liquids ensure the crust holds together without gluten, creating a flaky, tender texture․ Properly balancing liquids prevents the dough from becoming too dry or sticky, ensuring it rolls out smoothly․ Whether using water, egg, or vegan alternatives, the right liquid ensures a golden, delicious crust for both sweet and savory pies․

Additives (Salt, Sugar, Xanthan Gum)

Additives enhance flavor and texture in gluten-free pie crusts․ Salt brings out flavors, while sugar adds sweetness for sweet pies․ Xanthan gum, optional in some recipes, helps bind ingredients without gluten․ Some recipes omit xanthan gum, relying on flours like sweet rice or oat for structure․ These additives balance the crust’s taste and texture, ensuring it’s flaky and cohesive․ Whether sweet or savory, they play a key role in achieving a delicious, professional-quality crust․

Equipment Needed for Making Pie Crust

Essential tools include a mixer for blending ingredients, a rolling pin for shaping the dough, and a baking dish for perfectly baking the crust, ensuring a flaky texture․

Mixers and Tools

A stand mixer or hand mixer simplifies blending ingredients evenly, while a pastry blender or fork helps cut fats into flour for a flaky texture․ A rolling pin is essential for shaping the dough into a uniform thickness, and a lightly floured surface prevents sticking․ Additionally, a baking sheet lined with parchment paper is ideal for chilling the dough before rolling, ensuring it holds its shape and bakes evenly․ These tools make crafting a gluten-free crust effortless and professional․

Rolling Out the Dough

Rolling out gluten-free dough requires a gentle touch to maintain its structure․ Lightly flour your surface and roll from the center outward, ensuring even thickness․ Rotate the dough occasionally to achieve a uniform circle․ Use parchment paper to prevent sticking and make transferring easier․ A rolling pin with a light touch helps avoid tearing, while a consistent motion ensures the crust remains intact․ This step is crucial for achieving a smooth, even base for your pie, whether sweet or savory․

Baking Essentials

Preheat your oven to 375°F (190°C) for optimal baking results․ Line your pie dish with parchment paper to prevent sticking and ensure easy removal․ Use pie weights or dried beans to hold the crust in place during blind baking․ Bake for 15-20 minutes, or until lightly golden․ For filled pies, adjust baking time based on filling instructions․ A preheated oven and proper tools like a pie shield or foil edges can prevent over-browning, ensuring a perfectly baked crust every time․

Step-by-Step Instructions

Learn to craft a gluten-free pie crust with simple steps: mix, chill, roll, and bake․ Achieve a flaky, tender texture using easy-to-follow instructions for perfect results․

Preparing the Ingredients

Start by gathering gluten-free flours like rice, oat, or millet․ Measure accurately for consistency․ Sift to remove lumps and ensure even distribution․ Chill fats like butter or dairy-free alternatives until firm․ Keep liquids, such as water or egg, ready․ Additives like salt or sugar should be pre-measured․ Ensure all ingredients are at room temperature unless specified․ This step sets the foundation for a smooth dough-making process, ensuring flaky and tender results in your gluten-free pie crust․

Mixing the Dough

Combine gluten-free flours, salt, and any additives in a bowl․ Cut in chilled fats until the mixture resembles coarse crumbs․ Gradually add liquids, mixing until a dough forms․ Avoid overworking to maintain flakiness․ Use a pastry cutter or fingers to blend fats evenly․ If using egg, incorporate gently․ Check consistency; adjust with more flour or liquid if needed․ Wrap dough in plastic and chill before rolling․ This step ensures a tender, buttery crust perfect for both sweet and savory pies․

Chilling the Dough

Chill the gluten-free dough in the refrigerator for at least 30 minutes to allow the flours and fats to relax, ensuring easier rolling․ Wrap tightly in plastic wrap to prevent drying․ If time permits, chill for up to 2 hours for optimal results․ Avoid overworking the dough before chilling, as this can lead to a tough crust․ Chilled dough can also be stored for up to 3 days or frozen for later use, making it convenient for meal prep or future baking projects․

Rolling Out the Crust

Place the chilled dough on a lightly floured surface or parchment paper, dusting with rice flour to prevent sticking․ Roll gently but firmly, starting from the center and working outward․ Use a rolling pin to achieve an even thickness, about 1/8 inch․ If the dough cracks, gently press it back together without overworking․ Transfer the rolled crust to a pie dish, trimming edges to fit․ Crimp or flute the edges for a decorative finish, ensuring a secure seal for fillings․

Blind Baking (Pre-Baking)

Pre-bake the crust for fillings that don’t require cooking, like puddings or creams․ Line the crust with parchment paper, fill with pie weights, and bake at 375°F for 15-20 minutes․ Remove the weights and parchment, then bake for an additional 5-10 minutes until lightly golden․ This step ensures the crust is set and prevents sogginess․ For gluten-free crusts, this method is especially important to achieve a sturdy, flaky base that holds up beautifully to any filling;

Cooling the Crust

Allow the baked crust to cool completely on a wire rack to ensure it sets properly and maintains its structure․ Cooling prevents sogginess and helps the crust retain its flaky texture․ For pre-baked crusts, let them cool before adding fillings to avoid a soggy base․ This step is crucial for both sweet and savory pies, ensuring the crust stays crisp and holds up beautifully when served․ Proper cooling enhances the overall texture and presentation of your gluten-free pie․

Tips for a Flaky and Tender Crust

Master the art of a flaky and tender gluten-free pie crust with gentle handling, precise ingredient ratios, and minimal dough manipulation for a perfect texture every time․

Handling the Dough

Handle the dough gently to avoid overworking, which can lead to a tough crust․ Keep the dough cold to maintain its structure and ensure flakiness․ Use a light touch when rolling to prevent tearing․ If the dough becomes too warm or sticky, refrigerate it for 10-15 minutes to firm up․ Always roll on a floured surface or parchment paper to prevent sticking․ Avoid over-stretching the dough when placing it in the pie dish, as this can cause shrinking during baking․ Refrigerating the dough before rolling enhances its pliability and reduces cracking․

Achieving the Perfect Roll

To achieve a perfect roll, ensure the dough is well-chilled and slightly softened․ Roll on a lightly floured surface or parchment paper, using steady, even strokes․ Start from the center and roll outward to maintain an even thickness․ Avoid over-rolling, as this can disrupt the flaky layers․ If the dough begins to crack, gently press it back together with your fingers․ For a uniform crust, aim for a thickness of about 1/8 inch․ This ensures even baking and a tender texture․

Troubleshooting Common Issues

If the crust is too crumbly, add a little more liquid․ If it’s too sticky, add a small amount of flour․ For shrinkage during baking, ensure the dough is well-chilled and consider using pie weights․ Cracks can be gently pressed back together before baking․ Overworking the dough can lead to toughness, so mix just until ingredients combine․ Adjusting these steps will help achieve a flaky, tender crust that holds together beautifully․

Vegan and Dairy-Free Options

Explore dairy-free substitutes like vegan butter or coconut oil for a tender, flaky crust․ Easily adapt the recipe to be vegan, ensuring a delicious, gluten-free result․

Substitutes for Butter and Dairy

For a vegan crust, replace butter with vegan butter or coconut oil․ Use almond, oat, or coconut milk as dairy-free alternatives․ These substitutes ensure a tender, flaky texture while maintaining flavor․ Experiment with combinations to achieve the perfect consistency․ Ensure the dough holds together by adjusting liquids slightly, as dairy-free fats can behave differently․ This approach allows everyone to enjoy a delicious, wholly gluten-free pie crust without compromising on taste or texture․

Ensuring the Crust Holds Together

To ensure a gluten-free crust holds together, use xanthan gum or natural binders like egg or flaxseed․ Handle dough gently to avoid breaking․ Chill thoroughly to firm fats, preventing crumbling․ Use the right ratio of flours for structure․ Blind baking with weights helps maintain shape․ Avoid overworking dough, as it can lead to cracking․ These steps ensure a sturdy, cohesive crust that bakes evenly and holds fillings perfectly, whether sweet or savory․

Freezing and Storage Instructions

Gluten-free pie crust dough can be frozen for up to 3 months in an airtight container․ Thaw overnight in the fridge or at room temperature for 30 minutes before use․ Store baked crusts in an airtight container at room temperature for up to 2 days or freeze for later use․ Proper storage ensures freshness and maintains texture․

Freezing the Dough

Gluten-free pie crust dough can be frozen for up to 3 months․ Wrap it tightly in plastic wrap or place in an airtight container․ For best results, divide the dough into portions before freezing․ When ready to use, thaw overnight in the fridge or let it sit at room temperature for 30 minutes․ Frozen dough retains its texture and flavor, making it a convenient option for future baking․ Proper freezing ensures freshness and ease of preparation․

Thawing and Using Frozen Crust

Thaw frozen gluten-free pie crust dough overnight in the fridge or at room temperature for 30 minutes․ Once thawed, the dough retains its texture and flavor, ready to roll out for baking․ This convenient method ensures freshness and simplifies meal preparation․ Perfect for bakers who prefer to plan ahead, frozen crusts offer flexibility without compromising quality or taste․

Serving Suggestions and Recipe Ideas

Enjoy your gluten-free pie crust with delicious sweet or savory fillings, from classic apple and pumpkin to hearty chicken pot pie or quiche․ Perfect for any occasion!

Sweet Pie Fillings

Indulge in classic fruit pies like apple or pumpkin, or try cherry, blueberry, or chocolate fillings․ The gluten-free crust pairs perfectly with sweet flavors, offering a tender base for creamy caramel or lemon meringue pies․ Whether you prefer traditional spices or modern twists, these fillings complement the crust’s buttery texture․ Perfect for desserts, they bring warmth and joy to any gathering, ensuring a delightful finish to every meal․

Savory Pie Fillings

Elevate your meals with hearty savory pies, perfect for main courses or sides․ Try classic chicken pot pie, rich with tender chicken and vegetables, or opt for a beef and mushroom filling․ Shepherd’s pie, with its layered ground meat and mashed potatoes, is another delicious option․ These fillings pair beautifully with the gluten-free crust, offering a satisfying, flaky base for comforting, flavorful dishes that cater to various tastes and dietary preferences․

Mastering a wholly gluten-free pie crust opens up a world of delicious possibilities․ Perfect for sweet and savory fillings, it’s tender, flaky, and surprisingly easy to handle․

Final Thoughts on Gluten-Free Pie Crust

A wholly gluten-free pie crust is a game-changer for bakers, offering a tender, flaky texture that rivals traditional crusts․ With over 1,000 five-star reviews, it’s proven to delight․ Perfect for sweet or savory pies, this crust is easy to handle and bake․ Its simplicity and versatility make it a staple for any kitchen․ Whether you’re gluten-sensitive or just exploring new recipes, this crust brings joy and satisfaction to every pie you create․

Encouragement to Experiment

Don’t be afraid to get creative with your gluten-free pie crust! With its tender, flaky texture and easy handling, it’s the perfect canvas for both sweet and savory fillings․ Try experimenting with different flavors, like adding herbs for a savory pie or cinnamon for a sweet one․ The simplicity of this recipe makes it a great base for innovation․ Share your creations and enjoy the joy of homemade pie, knowing it’s gluten-free and delicious for everyone․