t7amr parts manual
Category : Manuals
The T7AMR parts manual is a comprehensive guide designed to help users identify, maintain, and repair components efficiently. It includes detailed diagrams, safety procedures, and troubleshooting tips for optimal machine performance and longevity.
1.1 Overview of the T7AMR Machine
The T7AMR is a high-performance Tennant rider-scrubber designed for efficient cleaning. Powered by BrainOS, it combines advanced technology with user-friendly operation, ensuring safety and productivity. Its compact design and eco-friendly features like ec-H2O NanoClean technology make it ideal for various environments, providing reliable and sustainable cleaning solutions while optimizing water and detergent usage.
1.2 Importance of the Parts Manual
The T7AMR parts manual is essential for maintaining machine performance and longevity. It provides detailed diagrams, component identification, and safety guidelines, enabling users to perform repairs and replacements accurately. This resource ensures efficient troubleshooting, reduces downtime, and promotes safe operating practices, making it indispensable for operators and maintenance personnel.
1.3 Target Audience for the Manual
The T7AMR parts manual is designed for operators, maintenance personnel, and authorized dealers. It provides essential information for troubleshooting, repairs, and part replacements, ensuring safe and efficient machine operation. This resource is invaluable for anyone involved in the upkeep and optimization of the T7AMR, promoting longevity and performance.
Structure and Content of the T7AMR Parts Manual
The manual features detailed diagrams, component identification, and safety procedures. It includes parts lists, troubleshooting guides, and maintenance best practices, ensuring safe and efficient machine upkeep.
2.1 Detailed Diagrams and Illustrations
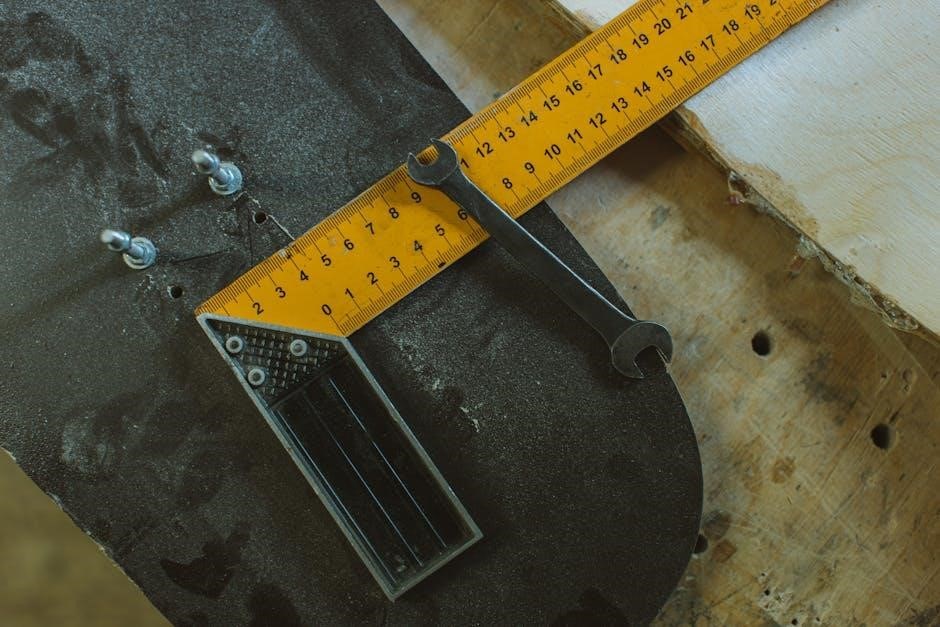
The manual includes clear, detailed diagrams and illustrations to help users identify and locate parts accurately. These visuals simplify complex components, ensuring easy navigation and understanding for operators and maintenance personnel.
2.2 Component Identification and Location
The manual provides a systematic approach to identifying and locating components, ensuring accurate part recognition. Users can reference the machine model and serial number to cross-check with detailed lists, minimizing errors and streamlining maintenance tasks.
2.3 Safety Procedures and Guidelines
The manual emphasizes critical safety measures, including pre-servicing checks and proper shutdown procedures. Users are advised to stop the machine on level ground, remove the key, and ensure all components are secure. Guidelines also stress the importance of using Tennant-approved parts and adhering to safe loading and unloading practices to prevent accidents.

How to Obtain the T7AMR Parts Manual
Access the Tennant website, navigate to the support section, and search for the T7AMR manual. Download the PDF directly for detailed parts information and guidance.
3.1 Accessing the Manual on the Tennant Website
Visit the official Tennant website and navigate to the support section. Search for the T7AMR parts manual using the machine model or serial number. Log in to your Tennant account for full access. The manual is available for free download in PDF format, ensuring easy access to detailed parts information and guidance.
3.2 Navigating the Support Section
Access the Tennant website’s support section by selecting the appropriate category. Use the search bar to find the T7AMR manual by model or serial number. Browse through sections like Manuals, Documentation, or Downloads. Ensure easy navigation by using filters or sorting options to locate the specific guide quickly and efficiently.
3.3 Downloading the Manual
Once located, click the download link for the T7AMR parts manual. Ensure compatibility with your device by selecting the correct format, such as PDF. Save the file to a designated folder for easy access. Verify the download’s integrity and open it with a compatible viewer to begin referencing the manual’s detailed information.
Safety Procedures in the T7AMR Parts Manual
The manual emphasizes pre-servicing checks, stopping on level surfaces, and using approved parts. Always turn off the machine and remove the key before servicing begins.
4.1 Pre-Servicing Checks
Before servicing the T7AMR, ensure the machine is stopped on a level surface and turned off. Remove the key to prevent accidental start-up. Check for any loose parts or wear, and verify all safety mechanisms are functional. Always refer to the manual for specific pre-servicing procedures to ensure safety and efficiency.
4.2 Safe Loading and Unloading Practices
Always load and unload the T7AMR on a level surface to prevent tipping. Avoid inclines exceeding 15 degrees during these operations. Secure the machine properly using approved lifting equipment or ramps. Follow the manufacturer’s guidelines to ensure safe handling and minimize the risk of damage or injury during transportation or storage.
4.3 Use of Approved Replacement Parts
Only use Tennant-approved or equivalent replacement parts to ensure compatibility and safety. Unauthorized parts may void the warranty or cause operational issues. Always refer to the parts manual for correct part numbers and specifications. This ensures optimal performance, reliability, and compliance with safety standards. Authentic parts guarantee proper fitment and machine longevity.
Identifying Parts for the T7AMR
Accurate part identification is crucial for maintenance and repairs. Locate the machine model and serial number on the data label, then cross-reference with the parts list for precision.
5.1 Locating the Machine Model and Serial Number
To identify parts accurately, locate the machine model and serial number on the data label, typically found on the rear or side of the T7AMR. This information ensures correct part compatibility and is essential for ordering. Always double-check the numbers against the parts list for accuracy before placing an order.
5.2 Using the Parts List for Accuracy
The parts list in the T7AMR manual provides detailed information, including part numbers, descriptions, and diagrams. Cross-reference the machine model and serial number with the list to ensure correct part identification. This step minimizes errors and guarantees compatibility. Always verify the part number before ordering to avoid delays or installation issues.
5.3 Cross-Referencing Part Numbers
Cross-referencing part numbers ensures accuracy when ordering replacements. Use the machine’s model and serial number to verify compatibility. Refer to the parts list and Tennant’s support resources for validation. This step prevents errors and ensures correct fitment. Always double-check part numbers before placing an order to avoid delays or installation issues.
Ordering Parts for the T7AMR
Ordering parts involves identifying the model and serial number, referencing the parts list, and contacting authorized dealers to ensure compatibility and prompt delivery.
6.1 Steps for Prompt Delivery
To ensure prompt delivery, identify the machine model and serial number from the data label, reference the parts list for accuracy, and place orders through authorized dealers. Using the correct serial number and following the parts list minimizes delays. Dealers often offer same-day shipping for in-stock items, ensuring timely receipt of components.
6.2 Ordering Through Authorized Dealers
Ordering through authorized dealers ensures quick access to genuine Tennant parts. Dealers offer fast shipping, with many items available for same-day dispatch. Their expertise helps verify part compatibility and ensure compliance with warranty terms. This streamlined process minimizes delays and maintains machine performance. Dealers also provide reliable customer support for troubleshooting and order tracking.
6.3 Ensuring Compatibility with the Machine
Ensure compatibility by using the machine model and serial number from the data label to select parts. Cross-reference part numbers in the manual to avoid mismatches. Incorrect parts may void the warranty or cause operational issues. Always use Tennant-approved components to maintain safety and efficiency, ensuring optimal performance and compliance with manufacturer standards.
Troubleshooting Guide in the Manual
The troubleshooting guide in the T7AMR manual offers solutions for common issues, diagnostic procedures, and steps for resetting or reconfiguring the machine to restore optimal function.
7.1 Common Issues and Solutions
It seems like your request got cut off. Could you please provide the complete subheading you’d like me to generate text for?
7.2 Diagnostic Procedures
The T7AMR manual outlines diagnostic procedures to identify machine issues. Start by stopping the machine on a level surface, turning it off, and removing the key. Check error codes on the touchscreen and consult the troubleshooting guide. Always follow safety guidelines and use Tennant-approved parts for accurate diagnostics and effective solutions.
7.3 Resetting or Reconfiguring the Machine
To reset or reconfigure the T7AMR, stop the machine on a level surface, power it off, and remove the key. Navigate to the settings menu on the touchscreen, select “Factory Reset,” and follow prompts. After resetting, test the machine to ensure proper function. Always refer to the manual for detailed instructions and safety guidelines.
Maintenance and Repair Best Practices
Regular maintenance ensures optimal performance. Replace wear and tear parts promptly, follow safety procedures, and refer to the manual for detailed repair instructions and guidelines.
8.1 Regular Maintenance Schedule
A regular maintenance schedule is crucial for optimal performance. Inspect components like brushes and squeegees monthly, replace worn parts, and follow the manual’s guidelines for routine checks. This ensures longevity and efficiency, preventing unexpected breakdowns and maintaining peak functionality.
8.2 Replacing Wear and Tear Parts
Regularly inspect and replace components like brushes, squeegees, and motors to maintain performance. Use the parts manual to identify compatible replacements and follow safety guidelines. Ensure proper fitment and compatibility to avoid machine damage. Prompt replacement prevents breakdowns and ensures efficient operation, extending the machine’s lifespan and reliability. Always use Tennant-approved parts for optimal results.
8.3 Optimizing Machine Performance
Optimize the T7AMR’s performance by utilizing ec-H2O NanoClean technology to reduce detergent and water usage. Regularly maintain and clean the machine, ensuring all parts function correctly. Follow energy efficiency tips and perform routine tune-ups to maximize productivity. Refer to the manual for guidance on optimizing settings and leveraging advanced features like BrainOS for enhanced cleaning efficiency and reliability.
Upgrading and Customizing the T7AMR
Upgrade and customize your T7AMR with compatible accessories and features to enhance performance and efficiency. Ensure all modifications comply with warranty terms for optimal functionality and reliability.
9.1 Compatible Upgrades and Accessories
Explore a range of compatible upgrades and accessories for the T7AMR, including advanced cleaning technologies and ergonomic enhancements. These additions optimize performance, efficiency, and user experience while maintaining machine integrity and warranty compliance. Always refer to the official parts manual for approved options to ensure seamless integration and reliability.
9.2 Installing Optional Features
Installing optional features on the T7AMR requires precise steps to ensure compatibility and functionality. Follow the manual’s guidelines for integration, using approved tools and parts. Proper installation enhances performance without voiding warranties, ensuring the machine operates efficiently with all added features. Always refer to the manual for specific instructions tailored to each optional feature.
9.3 Ensuring Warranty Compliance
Ensure warranty compliance by using only Tennant-supplied or approved parts. Follow installation and maintenance guidelines outlined in the manual. Unauthorized modifications or parts may void the warranty. Maintain detailed records of all services and parts replacements. Regularly review the manual for compliance updates to protect your investment and ensure uninterrupted coverage throughout the warranty period.
Common Parts and Components
The T7AMR manual details common parts like brushes, squeegees, motors, and electrical components. It also covers brackets and latch assemblies, essential for machine functionality and maintenance.
10.1 Brushes and Squeegees
Brushes and squeegees are critical for cleaning efficiency. The manual provides part numbers, replacement guidelines, and installation tips. Regular maintenance ensures optimal performance, preventing wear and tear, and extending machine lifespan by maintaining effective water and cleaning solution distribution across surfaces.
10.2 Motors and Electrical Components
The T7AMR parts manual details motors and electrical components, ensuring efficient operation. It specifies part numbers for brushless or induction motors, controllers, and sensors. Proper maintenance and replacement of these components are crucial for reliability, energy efficiency, and optimal performance, ensuring the machine operates smoothly under various conditions.
10.3 Brackets and Latch Assemblies
The T7AMR parts manual provides detailed information on brackets and latch assemblies, essential for securing components. Durable materials ensure structural integrity and longevity. Diagrams guide identification and installation, while maintenance tips help prevent wear. Authentic Tennant parts ensure compatibility and optimal functionality, maintaining the machine’s performance and operational efficiency over time.
Environmental and Efficiency Features
The T7AMR incorporates ec-H2O NanoClean Technology, minimizing water and detergent use. Energy-efficient design reduces operational costs and environmental impact, promoting sustainable cleaning practices and supporting eco-friendly operations.
11.1 ec-H2O NanoClean Technology
The ec-H2O NanoClean Technology reduces water and detergent usage by converting water into a powerful cleaning agent through nanotechnology. This innovative feature enhances cleaning efficiency, lowers operational costs, and promotes eco-friendly practices, supporting sustainable cleaning solutions for the T7AMR machine.
11.2 Reducing Detergent and Water Usage
The T7AMR parts manual provides tips for minimizing detergent and water consumption. It highlights the ec-H2O NanoClean Technology, which reduces the need for traditional cleaning agents while maintaining effectiveness. This eco-friendly approach lowers operational costs and environmental impact, offering a sustainable cleaning solution detailed in the manual.
11.3 Energy Efficiency Tips
The T7AMR parts manual offers energy-saving tips to optimize machine performance. It emphasizes regular maintenance, proper battery care, and adjusting settings to reduce power consumption. By following these guidelines, users can lower energy usage while maintaining cleaning efficiency, contributing to cost savings and environmental sustainability;
The T7AMR parts manual is an essential resource for optimizing machine performance, ensuring longevity, and promoting safe, efficient operation. It empowers users to maintain and repair effectively.
12.1 Summary of Key Points
The T7AMR parts manual provides essential guidance for maintenance, repair, and operation. It includes detailed diagrams, safety protocols, and troubleshooting steps. By following the manual, users can ensure optimal performance, reduce downtime, and extend the machine’s lifespan, making it a vital tool for effective and efficient equipment management.
12.2 Final Tips for Optimal Use
- Always review the manual before servicing or repairing the machine.
- Use only Tennant-approved parts to ensure compatibility and safety.
- Follow safety guidelines to prevent accidents and machine damage.
- Perform regular maintenance checks to maximize efficiency.
- Replace worn parts promptly to avoid further damage.
- Keep the manual easily accessible for quick reference.